
Sometimes an image lacks a proper shadow when combining photos or creating a new background in Photoshop. So you end up needing to create a shadow from scratch.
Adding shadows to images is not a straightforward task because there are different types of shadows. You also need to consider where the light source comes from in the photo. If you are adding a subject to a new background, remember to look for indications of where the light source is by looking for existing shadows.
With that said, even if you are new to creating shadows in Photoshop, the 10 steps below will help guide you through the process.
Step 1: Prepare Your Subject On The New Background
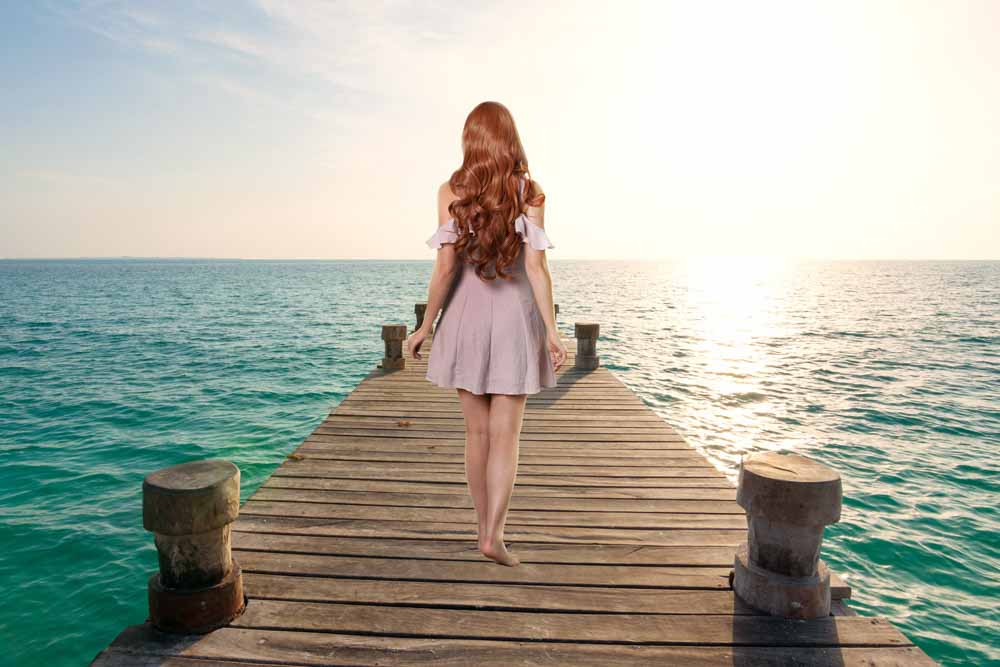
If you want to place a subject on a new background, you need to remove it from its current background and then place it on the new image. If you want to add a shadow to the existing background because of a lighting problem, it’s still a good idea to isolate your subject on a separate layer so you can add the shadow slightly beneath the subject.
There are many ways to remove a background, but the best method is using the Select Subject button, which is available in the Options bar when the Object Selection Tool is active and then using a layer mask to hide the background.

You can clean up the selection in the Select and Mask workspace if needed. You should also make sure your subject blends into the surrounding areas of the new area with various adjustment layers to prepare the image for the added shadow.
Once your subject is ready for the new background, you can start with the shadow-adding process.
Step 2: Determine The Direction Of The Light Source
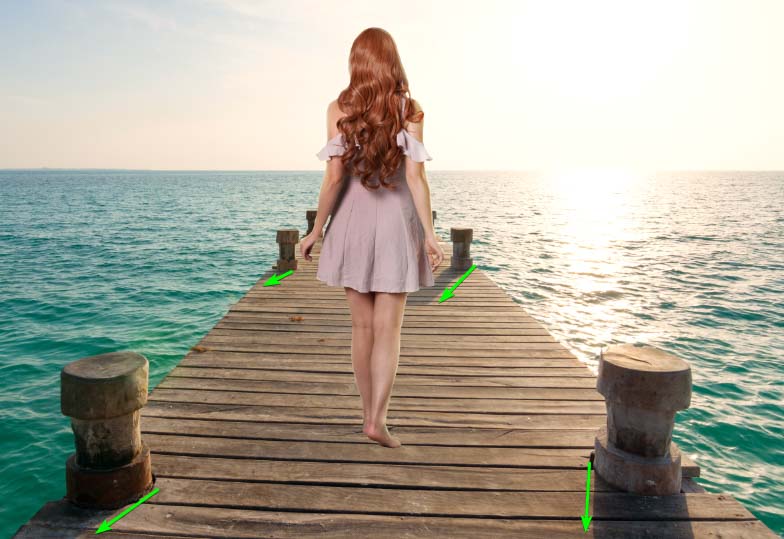
When adding a subject to a new image, you must check where the new light source is coming from. Sometimes, it will be evident if you can see the sun or a light source in the image. However, in other cases, you will need to look for clues as to where the light is coming from.
While my image has a prominent light source, the sun, I can still show you how to look for clues. Take note of any other shadows in the image and follow their direction to determine where to place the subject’s shadow.
In this image, the posts create shadows, and I can copy the general direction when adding the subject’s shadow.
You also need to consider what type of shadow you add since there are various types.
Understanding Cast Vs. Form Shadows
The two main types of shadows you might add to a photo are cast and form shadows. The kind of shadow you need to add is determined by the strength, direction, and distance of the light source. It also depends on how many light sources are present.
A cast shadow is a shadow that appears on the floor, wall, or other objects around your subject. Form shadows are the different shadows that appear on the subject itself, such as a person’s arm creating a shadow on their body.
If you have placed a subject on a new background with a new light source, you must consider correcting any form shadows on the subject. However, the prominent shadow is the cast shadow that appears along the ground or any objects around the subject.
Here, I am showing you how to create a cast shadow on the ground.
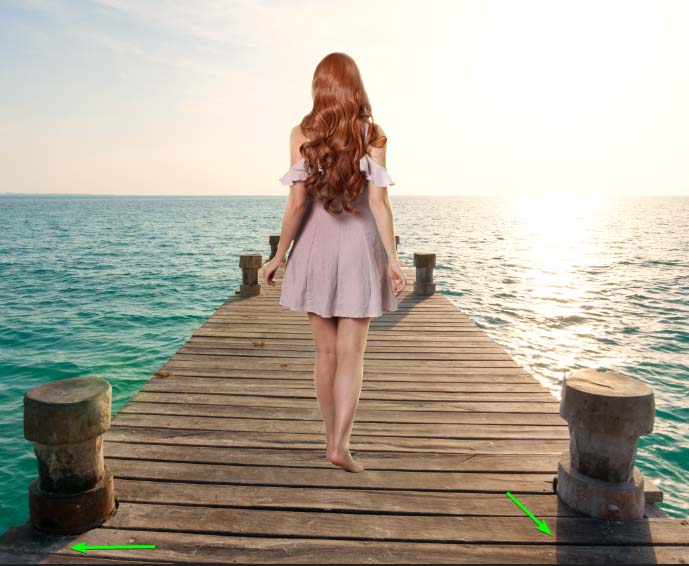
Step 3: Determine The True Shadow Color Using Existing Shadows
Before creating the shadow, it’s a good idea to determine what the actual color of the shadow should be. You can find this color using the shadows already in the photo’s background.
Some people may think that shadows are completely black or a shade of gray, but this isn’t the case. Most shadows have different hues, such as tints of blue or brown.
To find the correct color for the shadow, look at an existing shadow close to the subject. In my image, you will notice that the shadows in the distance are much lighter than the shadows next to the subject, so I want to match the shadows in the foreground.
To select the shadow color, select the Eyedropper Tool (I) from the Toolbar.

Then, click on an area of the existing shadow close to your subject.
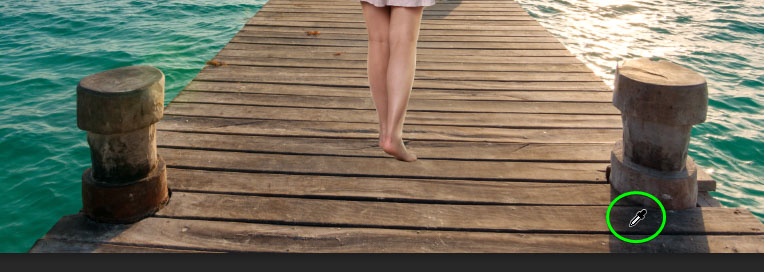
The foreground color will now be the selected color. While it may look black, if you double-click on the foreground swatch in the Toolbar, you will see that it isn’t entirely black.
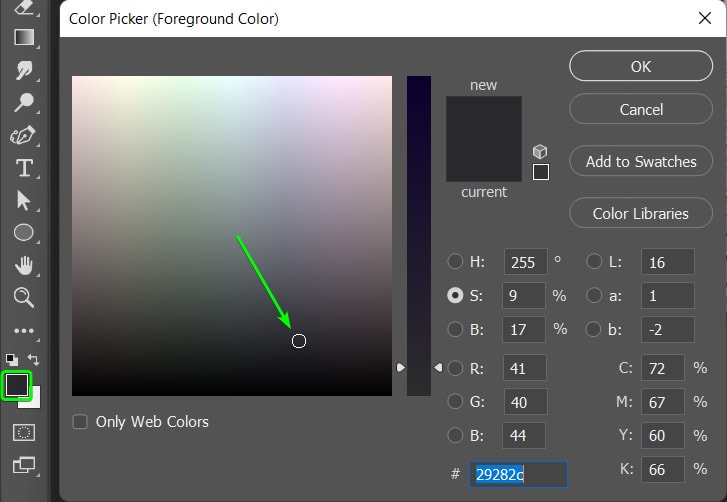
Leave the foreground color as it is, as you will use it in the next step.
Step 4: Create A Solid-Filled Copy Of The Subject
The first step is to create a copy of your subject as a solid fill. This copy will be used as the base of the shadow. To create the copy, make a selection around your subject again. You can use any selection tools for this, or if you have cut out your subject from the background, you can easily select it from the Layers panel.
In the Layers panel, find the layer that contains your cut-out subject. In my case, I created a layer mask to extract the subject from the initial background. Then, hold Control (Win) or Command (Mac) and click on the thumbnail that contains the subject. This will be the layer thumbnail if you deleted the background, or in my case, the layer mask thumbnail.
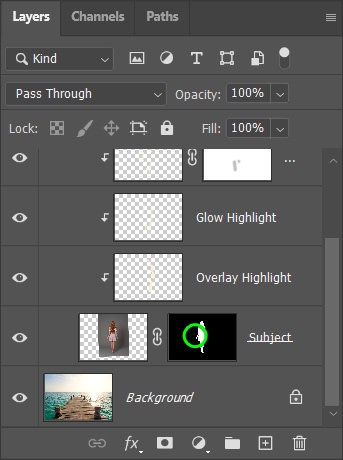
Once you click on the thumbnail, a selection appears around your subject.
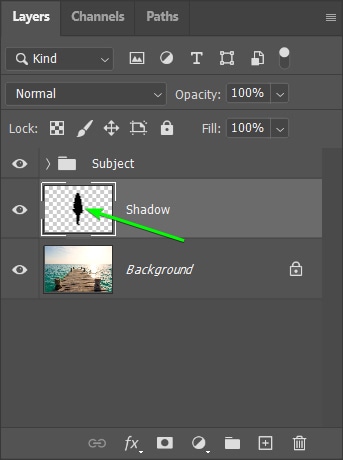
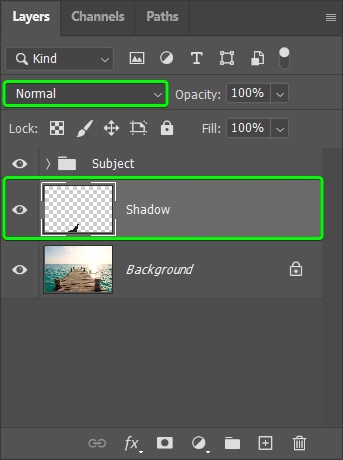
Create a new layer underneath your subject layer. A neat shortcut to keep the new layer underneath your subject is to select the subject layer or layer group. Then hold in Control (Win) or Command (Mac) while clicking on the add a new layer icon in the Layers panel.
The new layer is automatically added underneath the selected layer. Rename the new layer to “Shadow” to keep track of the layers.
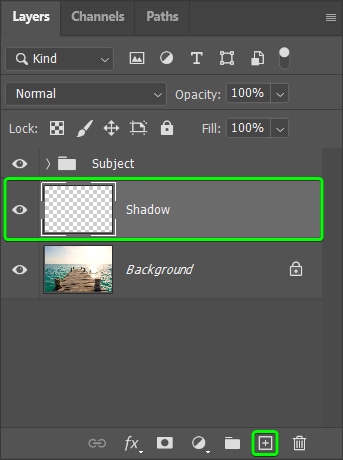
Now, with the Shadow layer selected and the selection still around the subject on the canvas, press Alt + Backspace (Win) or Option + Delete (Mac) to fill the selection with the foreground color. You should have already added the correct shadow color to the foreground swatch.
You won’t notice any change on the canvas as the new layer is hidden, but you will see the fill added in the Layers panel.
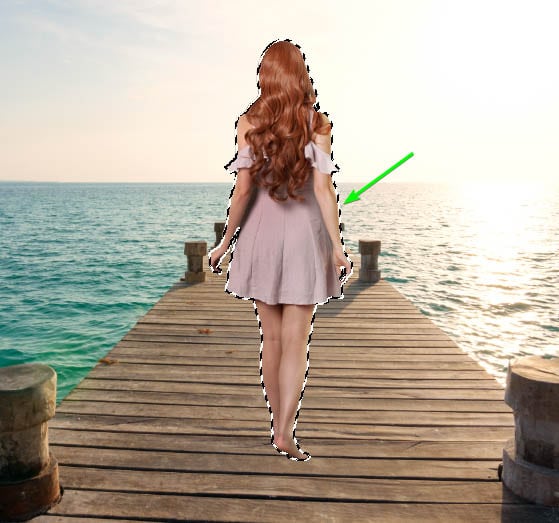
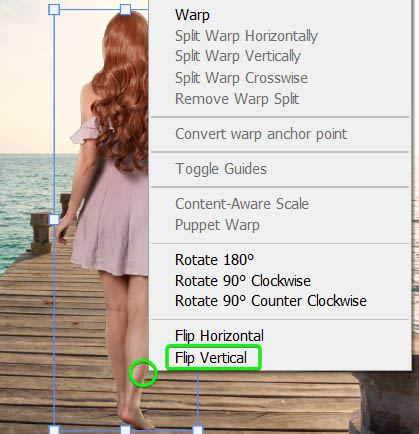
Step 5: Flip The Shadow And Move It Into Position
Deselect the subject by pressing Control + D (Win) or Command + D (Mac).
You now need to place the shadow correctly by flipping it and moving it down.
Press Control + T (Win) or Command + T (Mac) to activate Free Transform, then right-click (Win) or Control + click (Mac) in the transform box and select Flip Vertical.
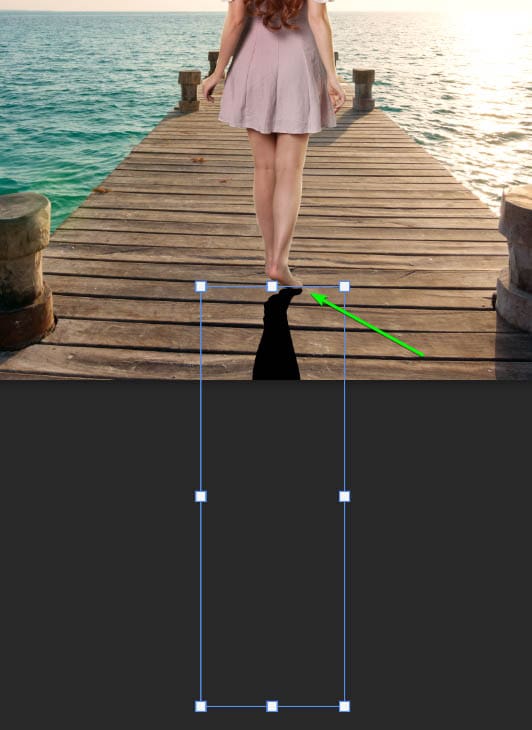
Then, click on the shadow and drag it down until the shadow touches the edge of the subject, which in my case, is the woman’s foot. The shadow may spill off the canvas, which is okay.
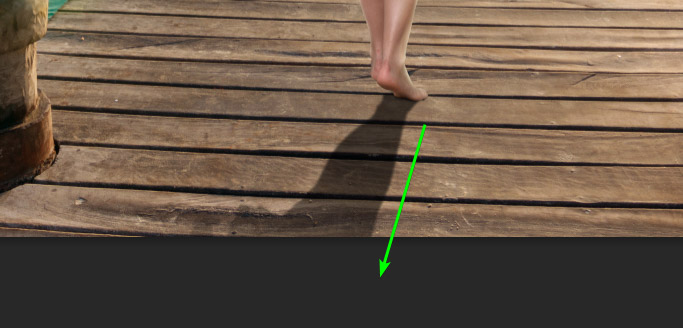
Step 6: Correct The Angle And Perspective Of The Shadow
The next step is to fix the shadow’s angle and perspective. If the light source comes from an angle, your shadow must match that angle. Again, you need to look at the nearest shadows already present in the photo to guide you.
Also, shadows aren’t carbon copies of the subject and are usually distorted because of the distance between the light source and the object it’s seen on.
You can correct both these instances using the Free Transform function. Keeping Free Transform active from the previous step, you can continue to angle and distort the shadow.
First, to match the correct angle, move your mouse cursor to just outside the transform box until the pointer turns into a double-arrow icon. Then, click and drag the mouse left or right to rotate the shadow. Match the shadow up with the existing shadows’ angle.
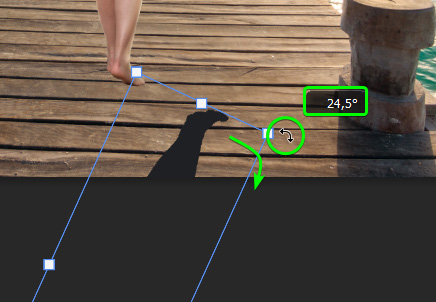
Click and drag the shadow to line up with the edge of the subject.

Then, to distort the shadow and change the perspective, right-click (Win) or Control + click (Mac) and select Perspective.
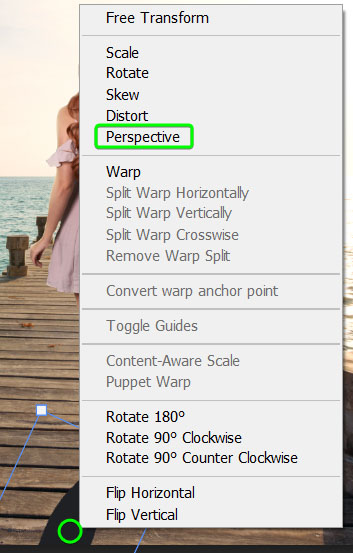
Now, click on any of the anchor points to distort the shadow. You will see how each anchor point and direction you move it in distorts the shadow.
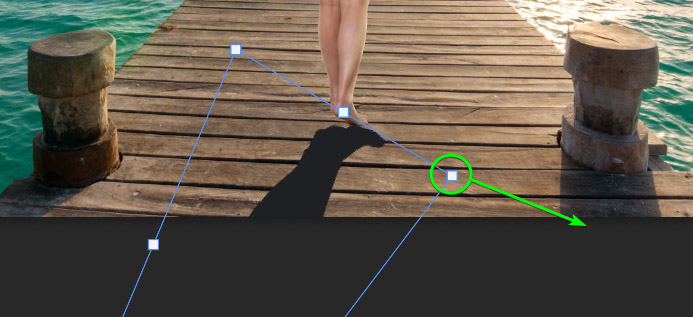
For my shadow, I pulled the bottom left anchor to the left and the top right anchor to the left. You can use this as a guide, but you should distort the shadow to match your image, using lines and other shadows in the image as examples.
Remember that you will likely be working off the canvas, so zoom out of the image using Control + – (Win) or Command + – (Mac) to see all the anchor points.
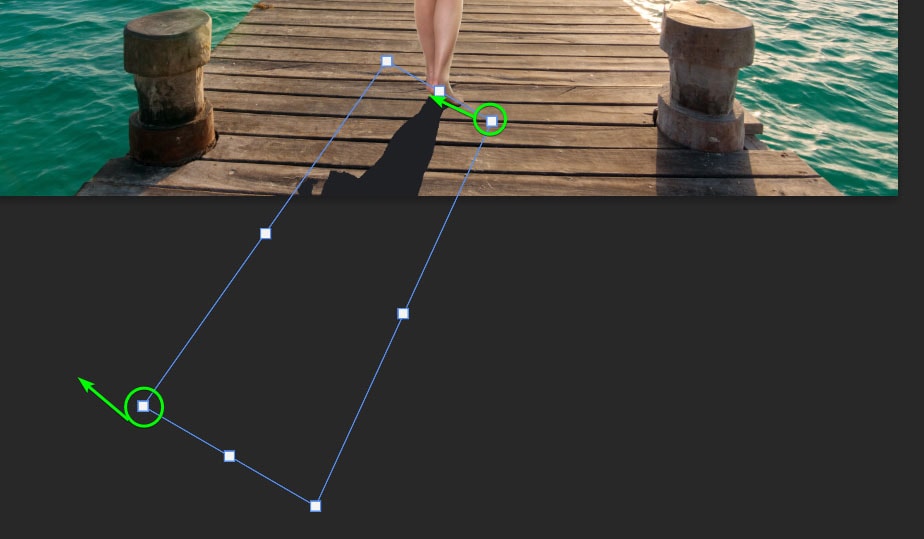
Press Enter or the checkmark in the Options bar to accept the changes you’ve made.

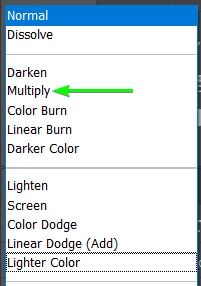
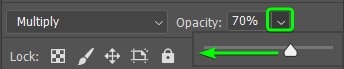
Step 7: Blend The Shadow Into The Image Using The Multiply Blend Mode And Opacity
The shadow I’ve added is too bold at this point, and shadows are usually blurry and slightly transparent. To correct this, I will blend the shadow into the background using two functions in the Layers panel.
First, select the Shadow layer and then use the drop-down menu next to Normal to change the Blending Mode.
From the list of Blend Mode options, choose Multiply.
Then, lower the opacity of the layer using the Opacity slider. Try to match the opacity of the surrounding shadows, but generally, you shouldn’t go too low. Typically between 65% and 85% is best.
The shadow should look lighter and more blended with the background at this point.
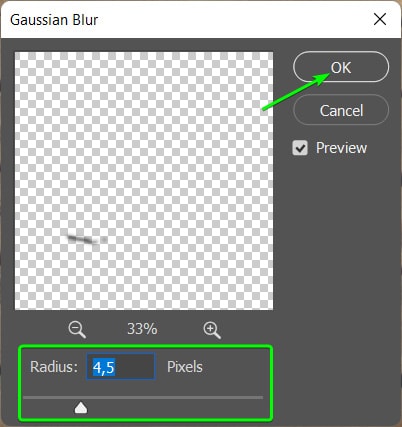
Step 8: Blur The Shadow Using Gaussian Blur
Now that your shadow is the right color and at the correct angle, you can blur it to create the fuzzy look that shadows often have. The amount of blur you need on your subject depends on the light source in the image.
Strong light sources typically cause well-defined shadows, and as the light source weakens, the more blurred the shadow becomes. If you don’t have existing shadows in your photo, work out how close and intense the light source is by how well-lit the scene is.
If you have existing shadows, as I do, use these to guide how blurry your added shadow should be.
To add the blur, with your Shadow layer selected, go to Filter > Blur > Gaussian Blur.
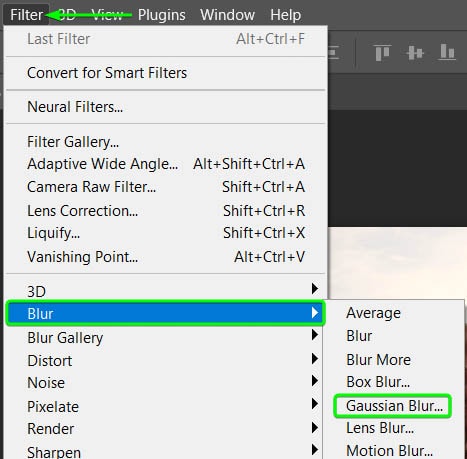
In the Gaussian blur window, check the box next to Preview to view the changes on the canvas. Then move the Radius slider to the right to add a blur to the shadow. Watch the blur changes on the canvas and use the other shadows as a guide. A Radius of about 4.5 pixels is good for my image.
Click OK when you have added the correct blur amount.

Step 9: Add A Contact Shadow (Optional)
Usually, shadows are much darker where the subject meets the ground, and if you want, you can add in the darker spots on your shadow. To add the contact shadow, add a new layer to your document below the existing shadow layer using the add new layer icon and rename it to Contact Shadow.
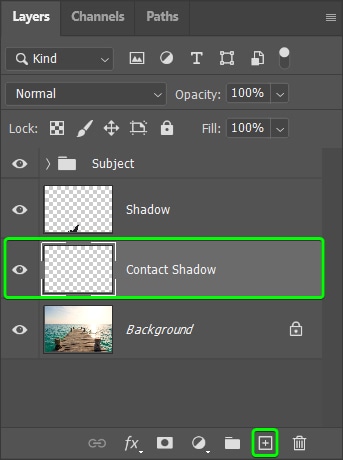
Next, select the Brush Tool (B) from the Toolbar and ensure that the foreground color is still set to the shadow color you chose earlier.

Zoom into the image to see where the subject touches the ground using Control + + (Win) or Command + + (Mac). Then resize the brush using [ to decrease the size and ] to increase the size. You want the brush size to be relatively small.
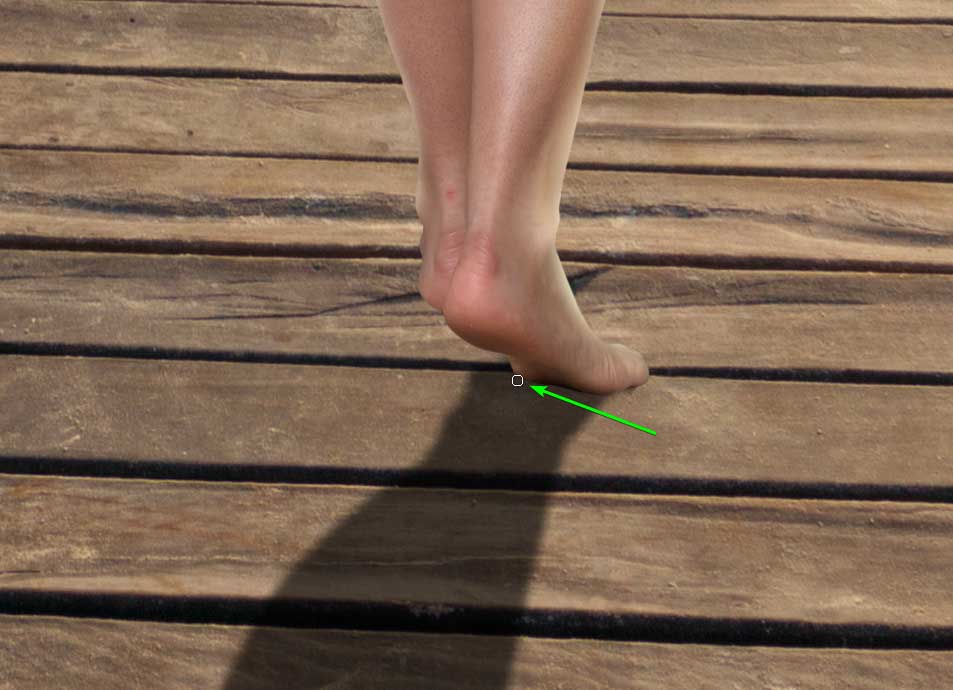
Use the brush to paint a darker shadow on the point of contact, keeping the brush as close to the subject as possible. Remember that the new layer is hidden below the subject layer, so if you brush over parts of the subject, the color won’t show on the subject. You should now have a darker area where the contact is.
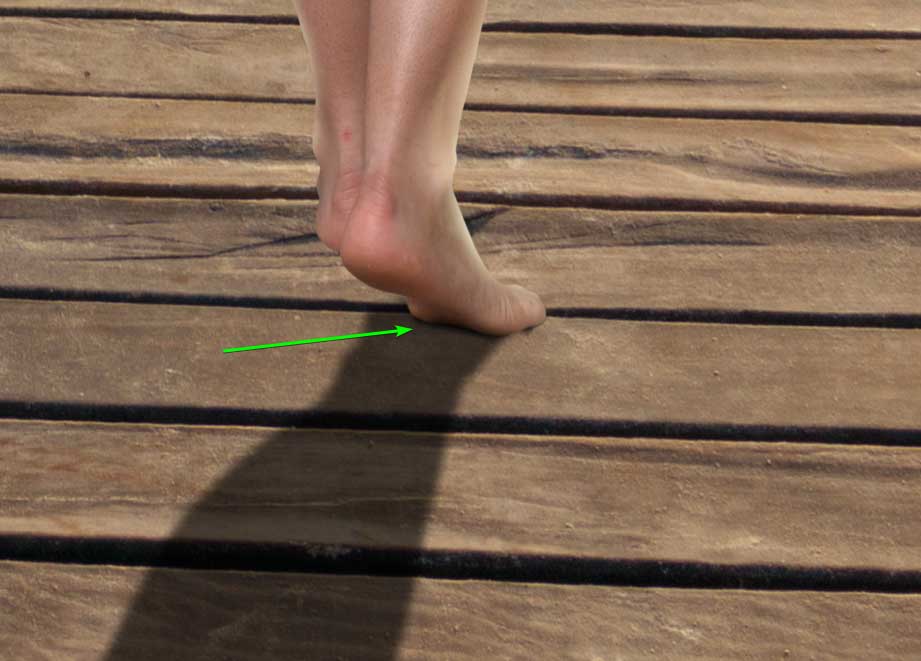
You can then add a blur to the contact shadow as you did previously by going to Filter > Blur > Gaussian Blur.
Then keep the Radius as the previous setting and click OK.
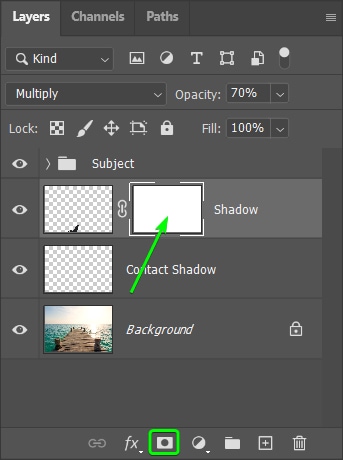
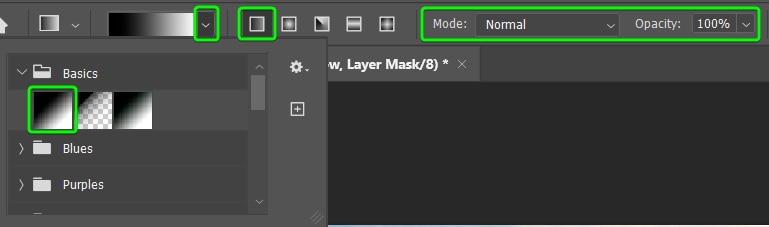
Step 10: Add A Gradient Layer Mask To The Shadow
Most shadows get lighter the further it is away from the subject. You can add a gradient to the layer mask to add a faded effect to the shadow.
Select the Shadow layer, then click on the add layer mask icon at the bottom of the Layers panel.
Next, select the Gradient Tool (G) from the Toolbar and change a few settings in the Options bar.

Use the Gradient preset drop-down menu to select a basic black-to-white gradient, then set the Gradient to Linear, which is the first icon next to the preset menu. Keep the Mode at Normal and the Opacity at 100%.
Now, move to where the shadow sits off the canvas. Then, draw a line from the hidden shadow toward the visible shadow.
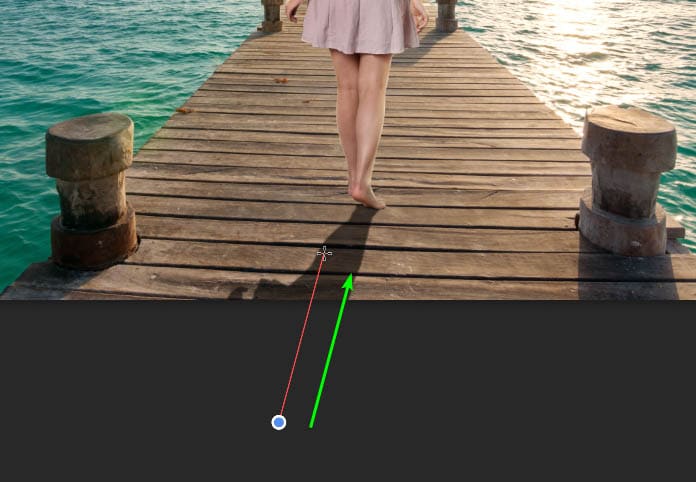
You can now see how the shadow begins to fade as it gets further away from the subject. You can make the fade as strong or subtle as you like.
You will now have a realistic shadow added to your image. If you need to, you can go back and fine-tune any areas, such as adding more blur to the shadow or darkening the contact shadow.
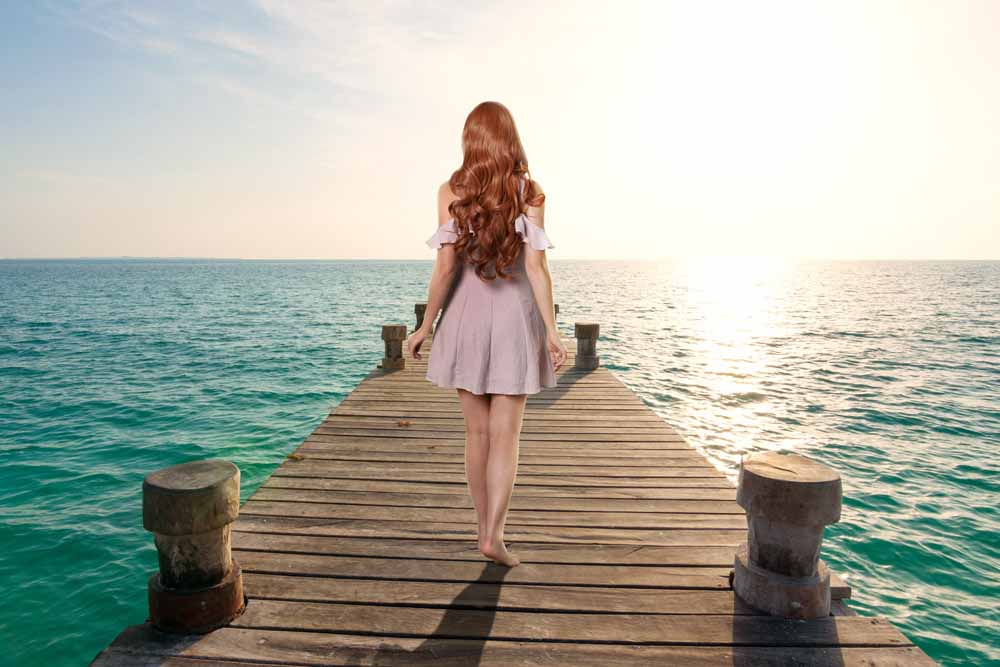
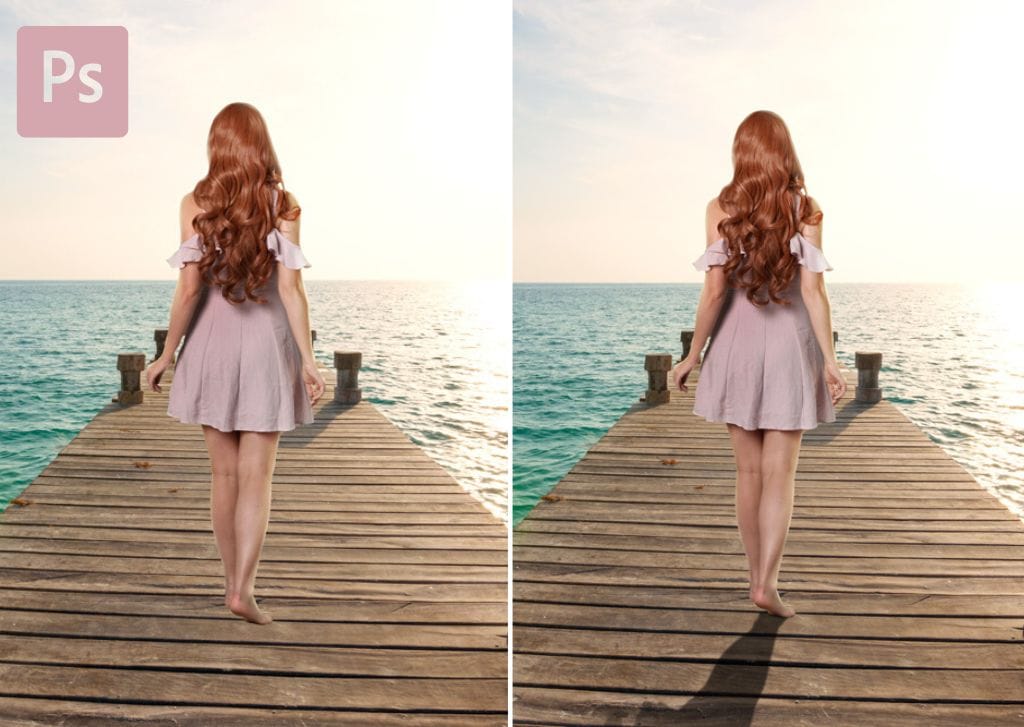
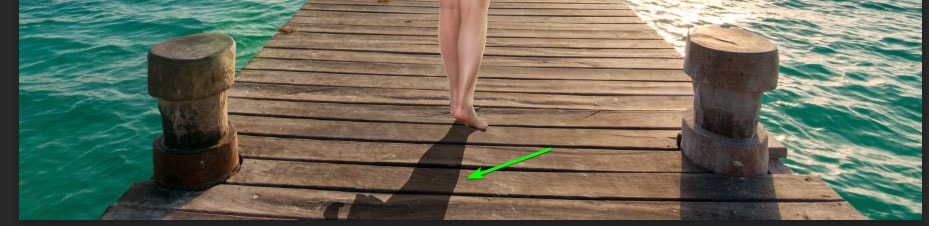
While combining photos is unnatural, it’s always important to keep them as realistic as possible (unless your aim is to create unrealistic pictures). Adding a shadow can make a composite image look more natural as if you took the photo just like that. In my example, you can see the woman looks as though she is floating without the shadow. When the shadow is added, she looks like she is standing on the dock.
If you enjoyed learning how to make a shadow in Photoshop, try it out yourself. To further distort images, you can use this technique along with the Puppet Warp Tool to add subjects to any background in almost any position.


