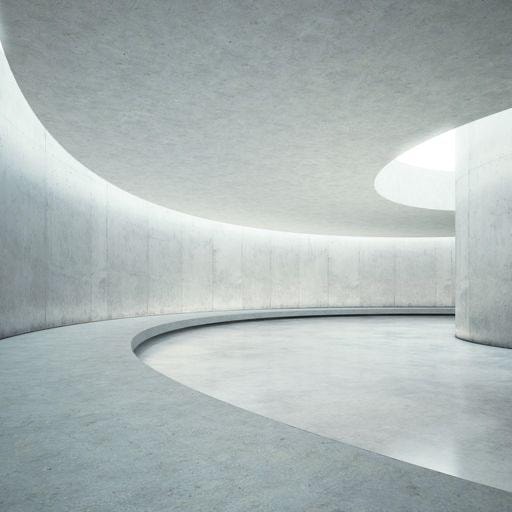

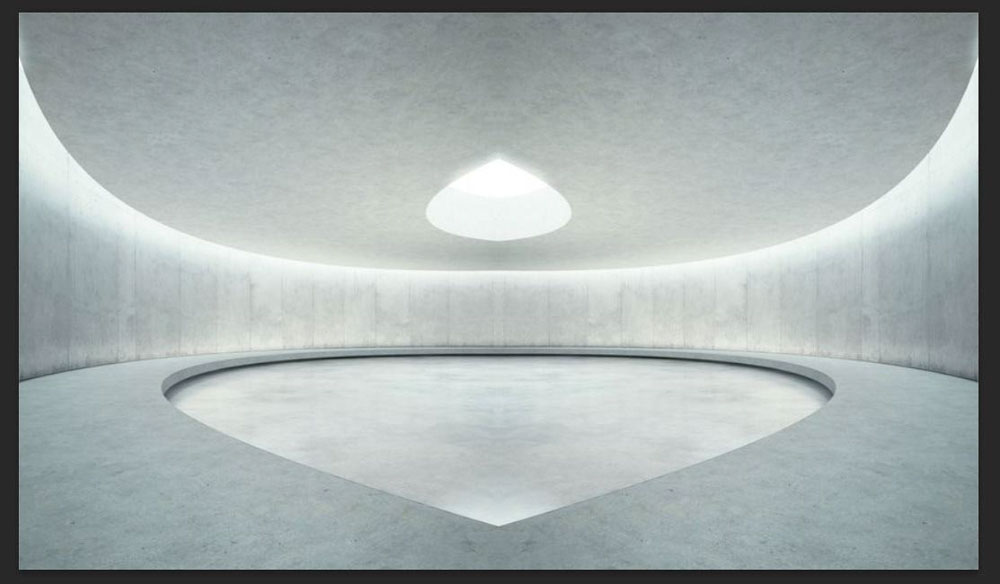
There are hundreds of effects you can create with your images in Photoshop, and one of the most popular effects is to mirror your image. Mirroring your image will create the illusion of your single image being expanded into two halves glued together to face each other. Pulling this effect off can create some amazing artistic opportunities. The question is, how exactly do you mirror an image in Photoshop?
When it comes to mirroring your images, there are a lot of people who go the long way around by doubling the size of their canvas first before doing the mirroring process. Luckily, you never need to worry about doing the math to double your canvas size ever again with this technique.
This will be a 9 step process that will involve cropping your image, duplicating the image, activating free transform, moving the reference point, and revealing your entire image by expanding the canvas with two clicks.
Step 1: Crop Your Image
Not every image will need to be cropped, but if you feel like there’s something in your image that won’t quite fit in the final piece, now is the time to crop it out. If you don’t crop your image before you start mirroring it now, you won’t be able to do it later.
To crop your image, find the Crop Tool (C) in the Toolbar.
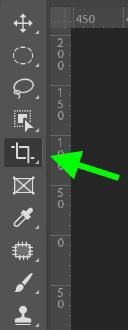
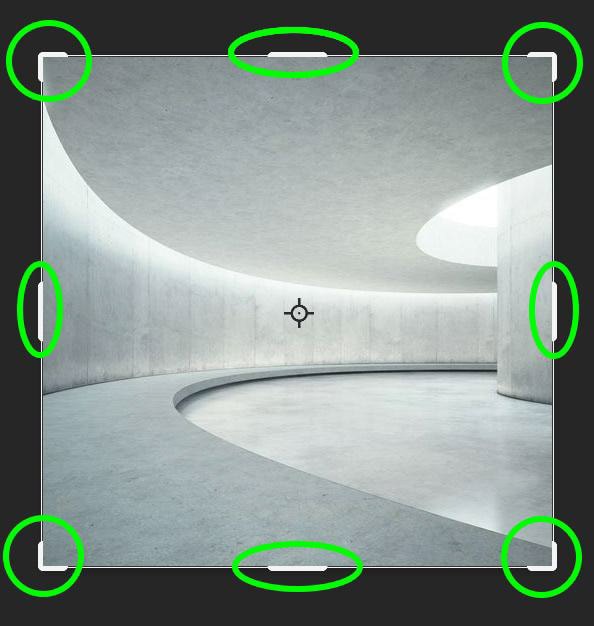
Your image will now have a Cropping Border around it. Each white bar on the border allows you to shrink your image toward the direction it’s facing.
Before we start cropping our image, we need to make sure that the Delete Cropped Pixels option is checked on in the Options Bar. If this option is not checked, the pixels that you delete will only be temporarily hidden. When we flip our image, all those pixels will return, ruining the effect altogether.

To crop your image, click and hold on one of the white bars and drag it to where you want your image to be cropped.

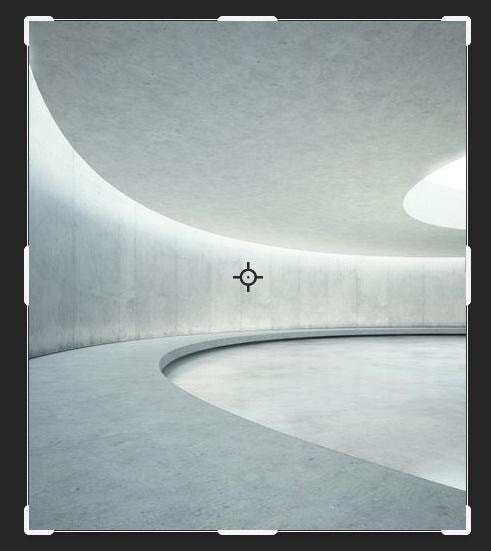
Keep in mind that you don’t have to crop your image if you don’t want to. It all depends on the project you’re working on. It’s perfectly fine to mirror your image without cropping it, so feel free to skip this step if you feel like your image is good to go.
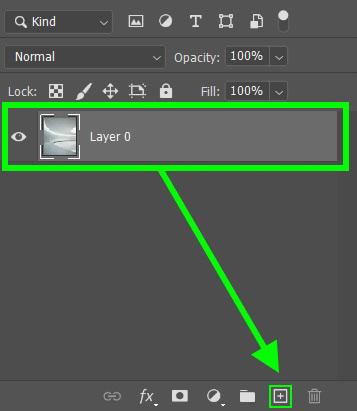
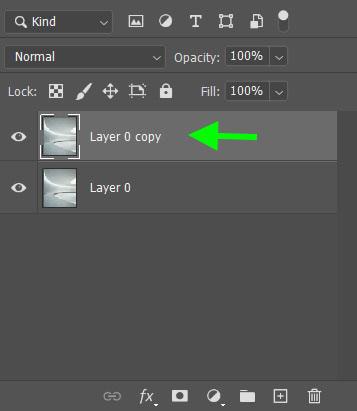
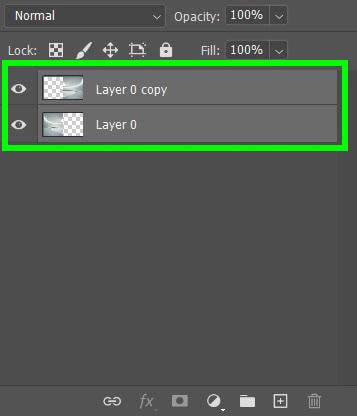
Step 2: Duplicate Your Image Layer
In order to mirror your image, you will need two copies of the same picture.
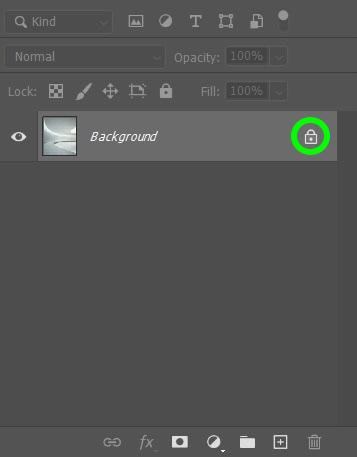
To duplicate your image, first make sure that your image layer is not locked. If the layer is locked, click on the Lock icon to unlock it. Or press Control + / (Win) or Command + / (Mac).
Now that your layer is unlocked, there are a few ways you can duplicate your image.
– Drag and Drop
You can click and hold on the layer you wish to duplicate and drag the layer onto the Create A New Layer Icon.
– Right-click
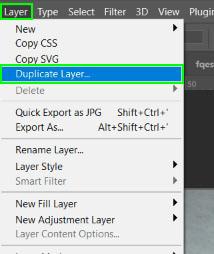
A fast way to duplicate a layer is by right-clicking the layer within the Layers Panel. A long list of options will pop up, and you just need to find Duplicate Layer.
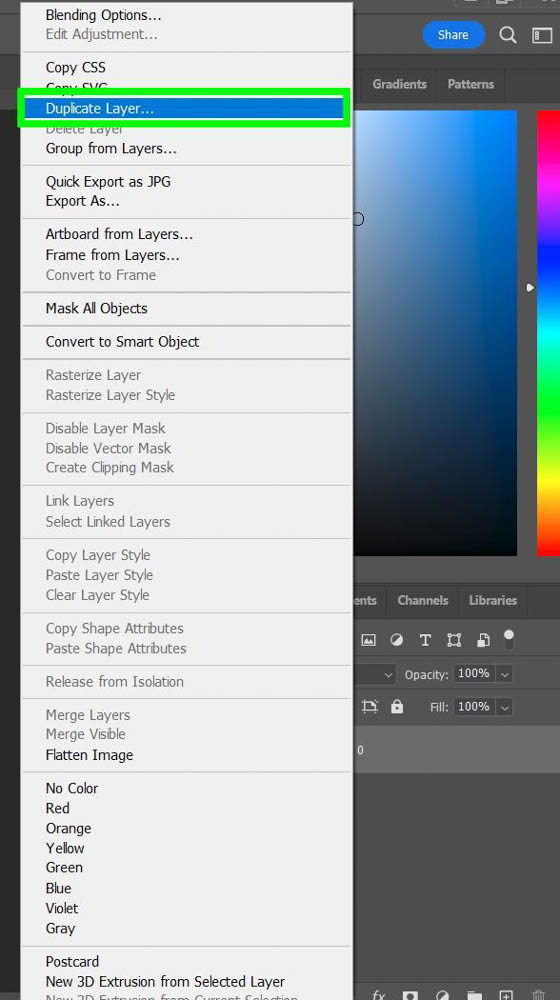
– The Layer Menu
Another way to duplicate your layer is by clicking on the layer you want to duplicate and going to Layer > Duplicate Layer.
– Keyboard Shortcut
The quickest way to duplicate a layer is by clicking on it and pressing Control + J (Win) or Command + J (Mac).
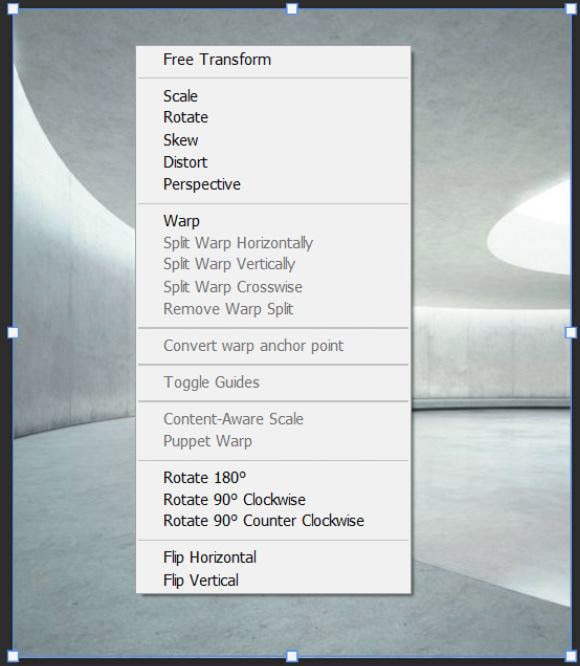
Step 3: Free Transform The New Layer
Free Transform is a mode that allows you to alter the image in a variety of ways. You can scale, distort, rotate or, in my case, flip an image both horizontally and vertically while in this mode.
In order to do this, press Control + T (Win) or Command + T (Mac).
You will know if this worked by right-clicking the layer and seeing a whole list of options pop up.
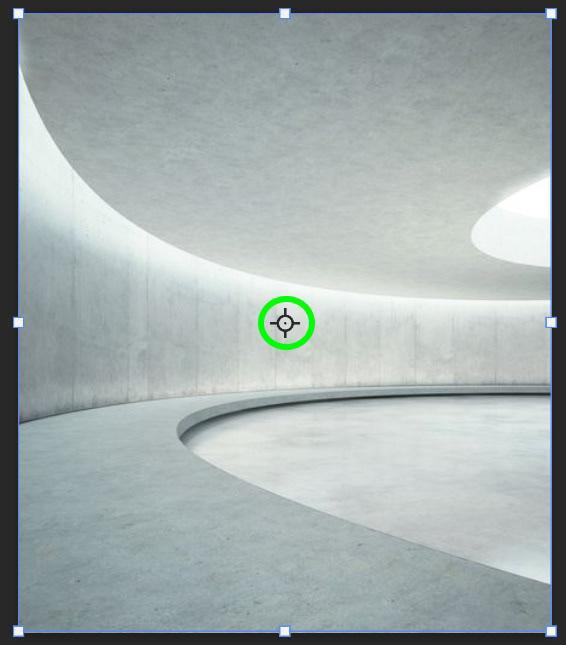
Step 4: Move the Reference Point To The Horizontal Or Vertical Edge
One last thing to do before flipping the layer. We need to make sure the layer gets flipped to where we need it.
We do this by moving the Reference Point to the side of the image you want your copied layer to flip to. The Reference Point is the crosshair in the middle of your image.
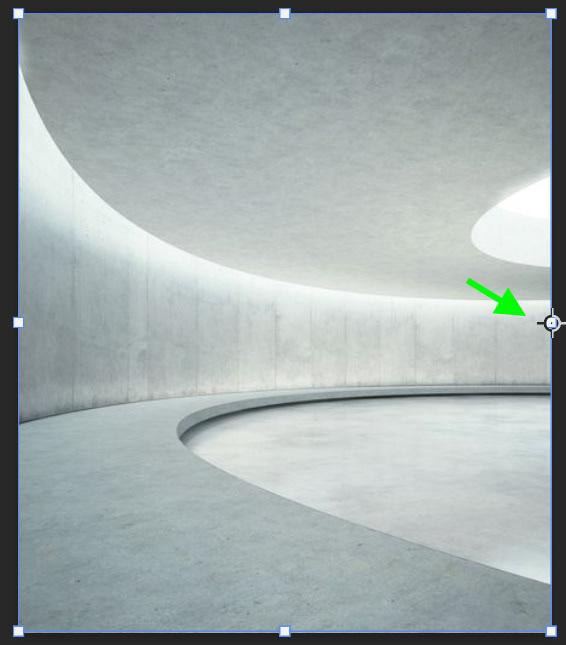
If you want your copied layer to flip vertically, click and hold on to the Reference Point and move it to the top or bottom of the image. If you want your copied image to flip horizontally, move the Reference Point to the left or right of the picture.
Step 5: Flip The Layer
Now that you set up the Reference Point, right-click on your image and select Flip Horizontal or Flip Vertical, depending on your project.
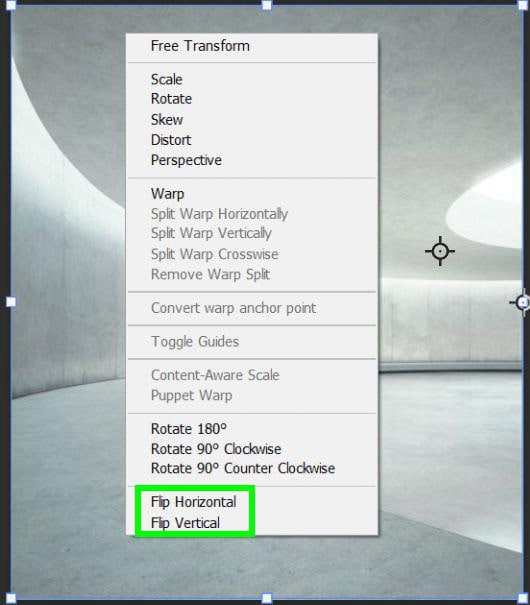
You will know this works when you see an outline of your flipped image outside of the visible canvas.
Step 6: Exit Free Transform
After you flip your image, you won’t be able to do much else until you exit out of Free Transform.
To do this, simply select the Move Tool (V).
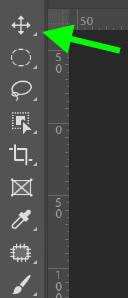
You can actually select any tool to exit out of Free Transform, but the Move Tool is always a good baseline tool to quickly grab.
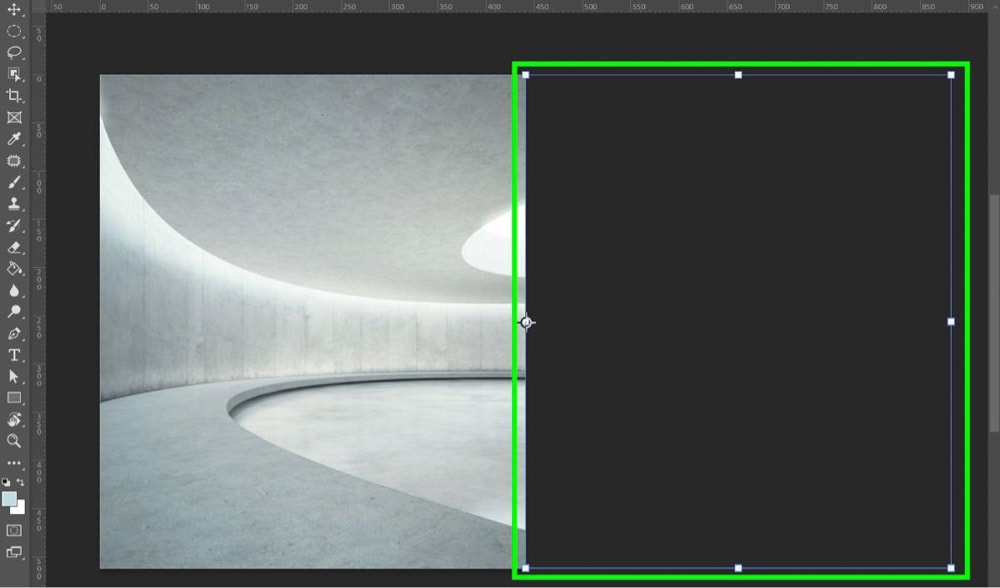
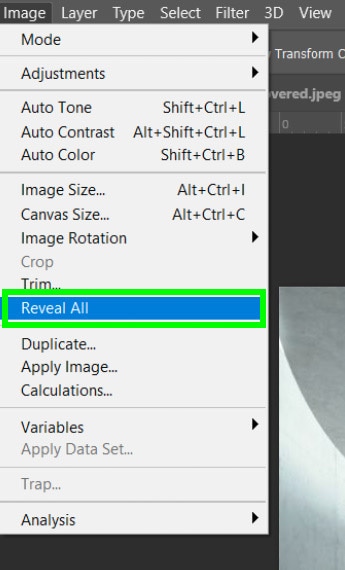
Step 7: Reveal Your Image By Going To Image > Reveal All
With your layer now out of the constraints of Free Transform, you can now reveal the copied image that you flipped outside of your visible canvas.
To do this, go up to Image > Reveal All.
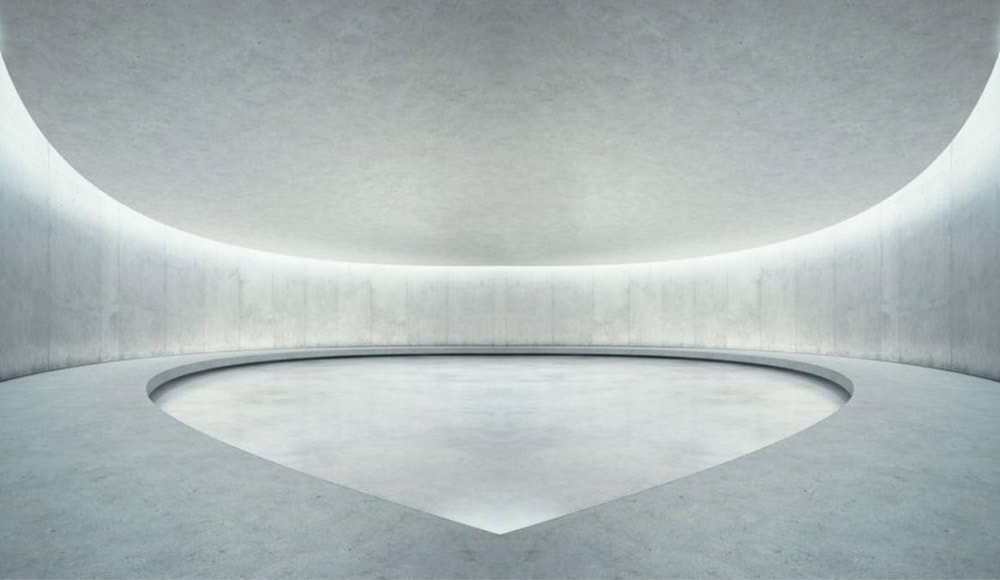
This will expand the canvas size to the exact dimensions of the flipped image you couldn’t see before. You can now see how good of a job you did with cropping your image in step 1.
If something looks off after you reveal your image, you may need to go back to step one and crop it to where you actually need it.
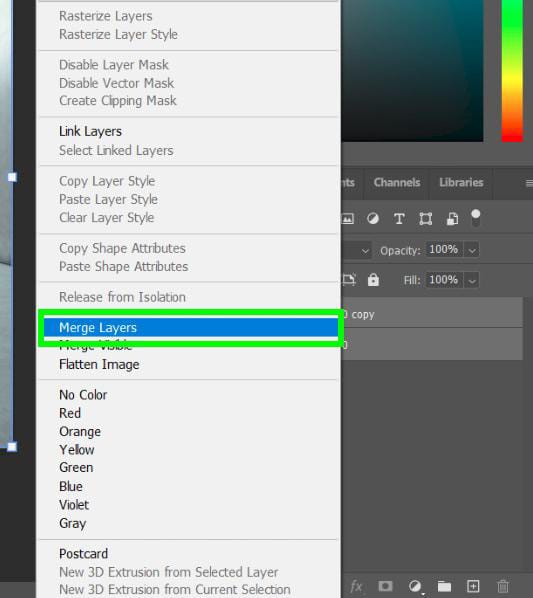
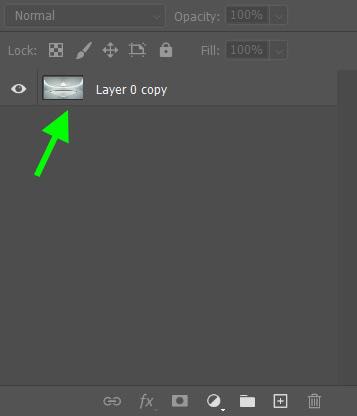
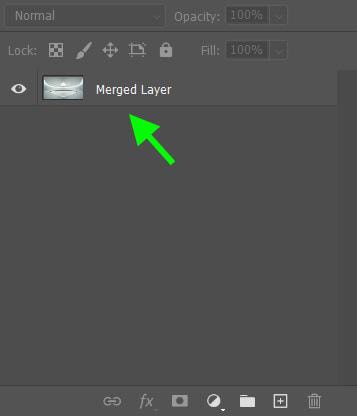
Step 8: Merge Your Layers
In order for your image to truly be one piece, you need to merge your layers. This will make it easier later if you have more layers or adjustments layers to add.
First, click on one of your layers in the Layers Panels, then hold down the Shift Key and click on the other layer. This will temporarily select both layers.
Now that your layers are temporarily grouped, right-click on either layer and choose Merge Layers. You can also click on the top layer and press Control + E (Win) or Command + E (Mac) to merge it with the layer below.
Merging your layers will create one layer. You can also double-click on the new merged layer to rename it if you wish.
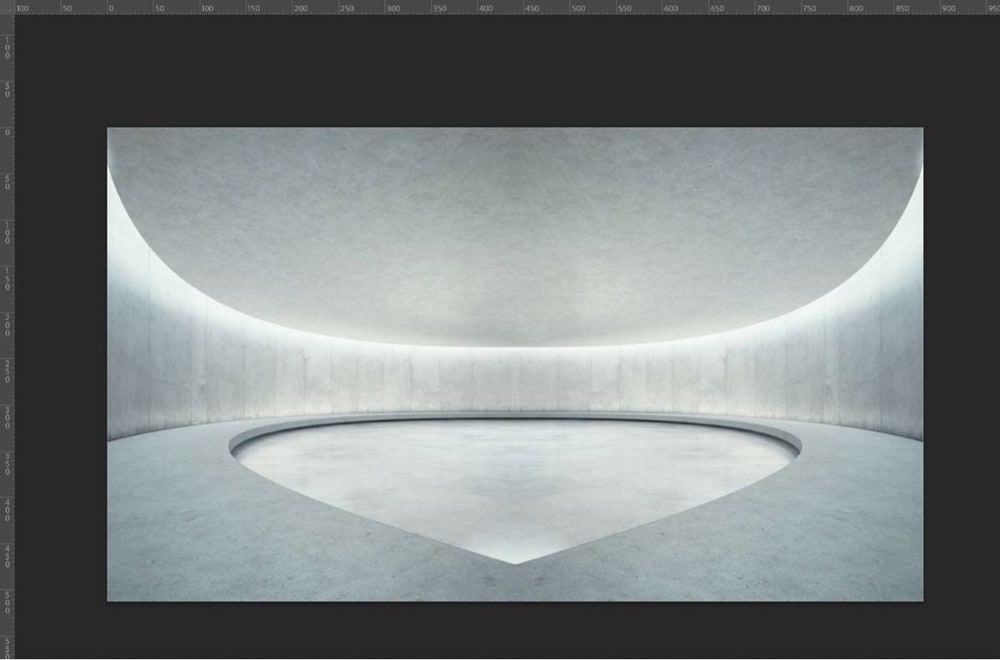
Step 9: Polish Your Image
This one will depend on the project you’re working on. Now is the time to do any removing, blurring, adjusting, or anything else you need to do to touch up your image. Whatever you need to add or delete in order to reach your artistic vision.
For my example, I’ll fill in the hole at the top using the Healing Brush (J).
The toughest part of the process is making sure you crop your picture at the exact spot you need to. The good news is that if you mess up, it doesn’t take too much time or effort to fix your mistake.