If you’re looking to spice up your logo, adding an outline in Photoshop is a great way to do so! The great thing about outlining graphics is that you can turn your logo into just an outline or add a border to your existing logo. With so many styles to choose from, you can find the perfect outline look for your logo with ease. Now, although we will cover some more technical ways of outlining a logo, here’s the easiest way to do things if you want a quick and easy method.
To outline a logo in Photoshop, first, make sure the logo has a transparent background, then double-click on the logo layer to open the Layer Styles. In the Layer Styles set the style to Stroke, set the stroke fill to “Solid Color,” and adjust the width as necessary. Now you have outlined your logo!
Throughout this tutorial, you will learn everything there is to know about outlining a logo in Photoshop. From solid colors, outline-only logos, gradient outlines, and more, your logo will look more stylish than ever with these tips.
How To Outline A Logo In Photoshop
Let’s first begin with the most basic type of logo outline in Photoshop.
Step 1: Create A Selection Of Your Logo
If your logo is on the same layer as an image or has a white background, you will need to remove it for this to work. There are many ways to create a selection of your logo, but the one I recommend is the Magic Wand Tool.
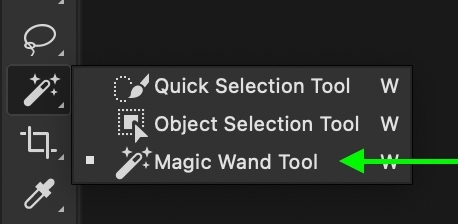
To select the Magic Wand Tool, press W on your keyboard or locate it in your toolbar.
Once active, go to the upper settings bar and set the sample size to 5 by 5 average, the tolerance to 25, and check off anti-alias. If you want to know the purpose behind each of these settings, check out this video tutorial.

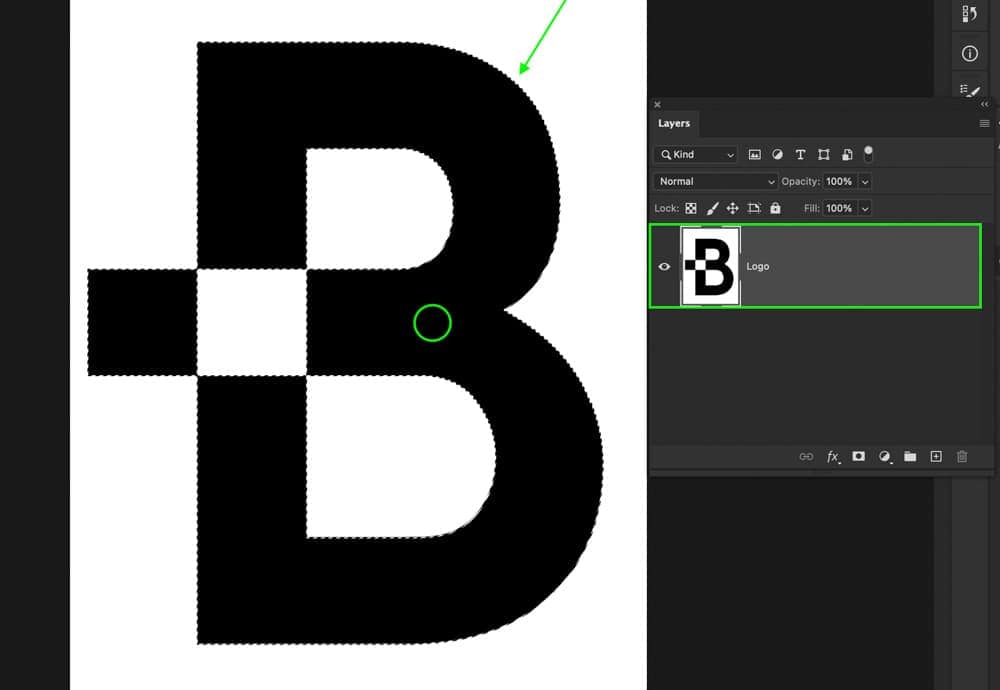
With your Magic Wand settings in order, make sure your logo layer is selected, then click on your logo in the canvas to select it. The Magic Wand Tool will select all similar colors to your sample, which in this case is your logo.
If your logo has multiple colors, hold Shift and click on the additional colors you wish to add to your selection.
Now you are left with a selection around your entire logo.
Step 2: Add The Selection To A Layer Mask
With this active selection, you can remove the background of your logo by adding a layer mask. Simply click on the layer mask icon at the bottom of the layers panel while your logo layer is selected.
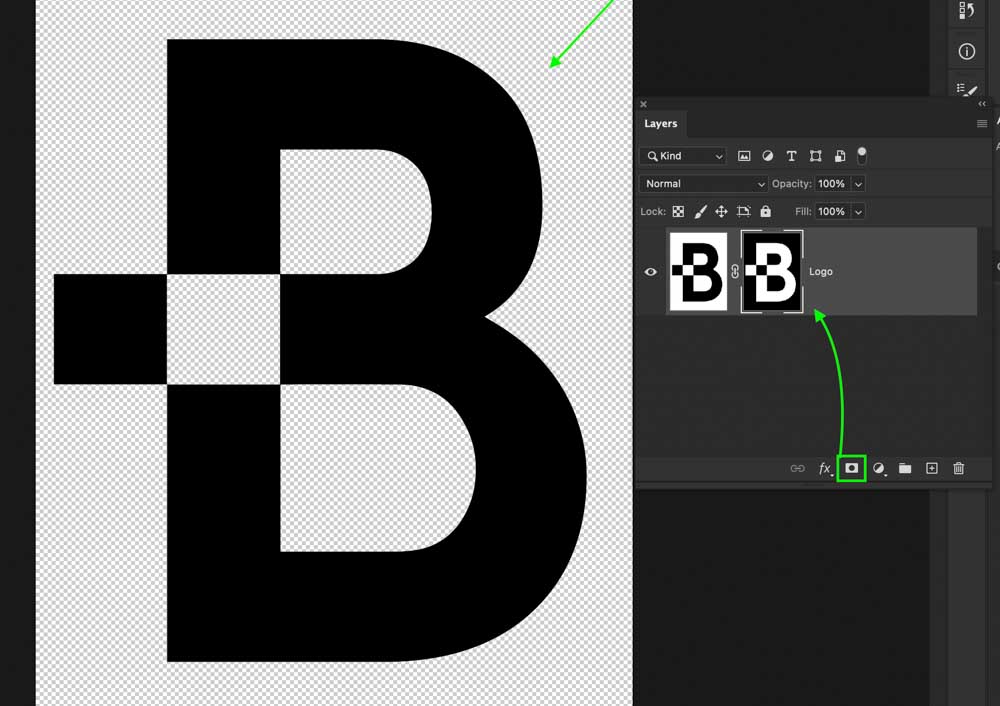
Now your logo will have a transparent background.
Step 3: Open Layer Styles
Next, double-click on your logo layer to open the Layer Styles. This panel is home to all your layer design options, such as creating an outline (aka stroke).
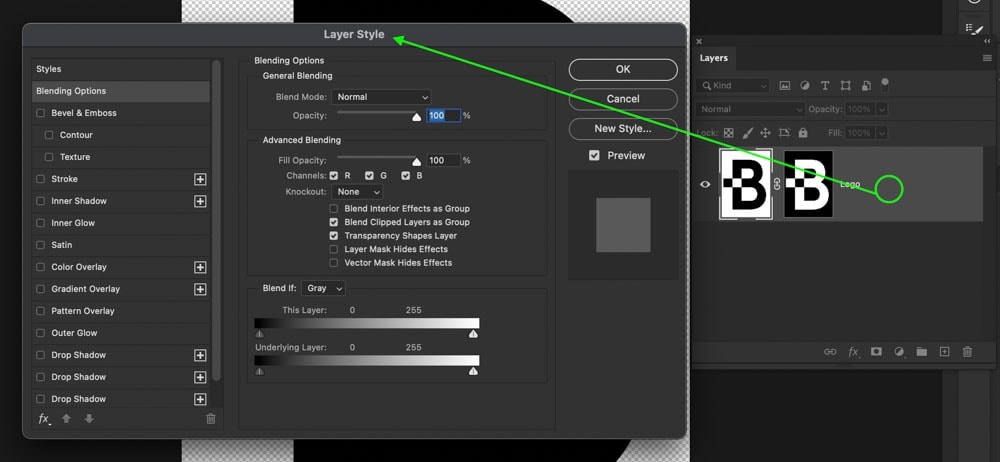
Step 4: Set The Style To “Stroke”
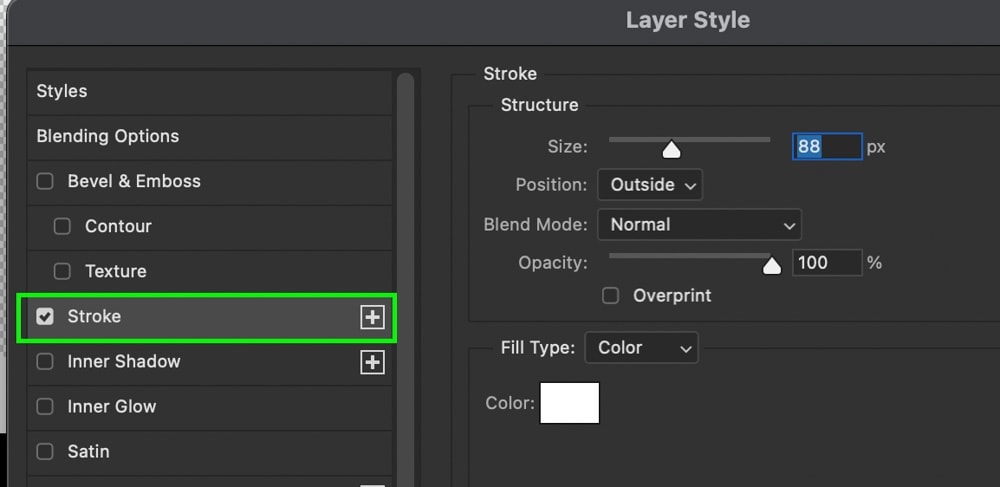
To add an outline to your logo, click on “Stroke” in the styles options on the left side of the dialogue box.
Step 5: Set The Stroke Fill To Solid Color
Set the Fill to “Solid Color” within the stroke settings so your outline will be filled with color. You can also fill your outlines with gradients or patterns, but I’ll touch on that later.
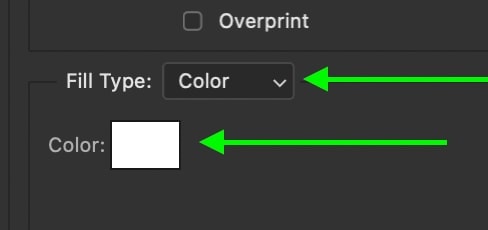
With the Solid Color option chosen, you can click on the Color box to select a color for your outline.
Step 6: Set The Stroke Position To “Center”
Now change the position of your stroke to Center. This will add an outline equally around the edges of your logo rather than only on the inner or outer edge. Although the “Outside” setting works better for outline people, the center option offers better results for logos.
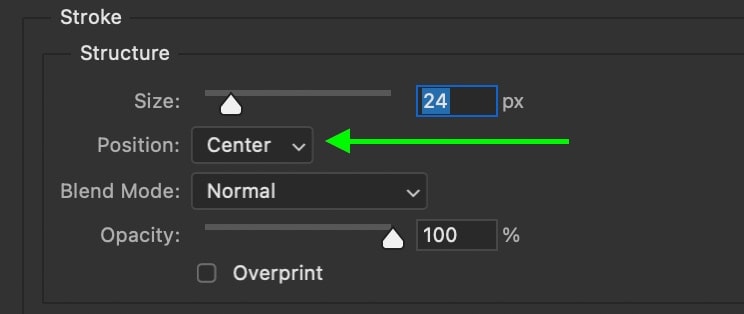
Step 7: Adjust Your Additional Stroke Settings As Needed
With all your main settings in order, go through and adjust your outline size and blending mode as needed. For most situations, you will want to leave the blend mode set to Normal. As for the outline width, simply increase the size value for a thicker outline of your logo.
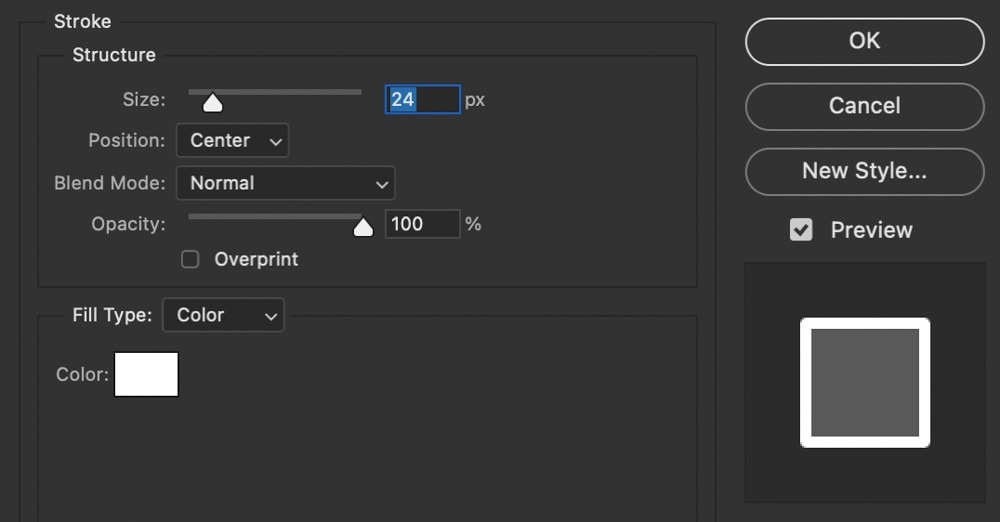
Once happy, click OK to exit the Layer Styles.
The Result
Now you have added a solid colored outline to your logo using Layer Styles in Photoshop. The beauty of layer styles is that you can now go back and edit them later on if needed. Looking at your logo layer, simply double-click on your Layer FX to open the layer styles once again and edit your stroke settings. This way, you can easily adjust the color or size of your outline later on in your workflow!
How To Turn A Logo Into An Outline In Photoshop
For this next example, you will learn how to say remove the color of your logo and only leave a colored outline behind.
Step 1: Select Your Logo With The Magic Wand Tool
Following similar steps to the last section, once again select the Magic Wand Tool by pressing W or find it on your toolbar.

With the tool active, go to your upper settings bar and set the Sample Size to 5 by 5 average, the tolerance to 25, and check off anti-alias.

Then click on your logo to sample its color and create a new selection. If there are multiple colors in your logo, hold Shift and click on the colors you want to add to your selection.
If the Magic Wand Tool selects parts of your image that you do not want to be selected, hold Alt or Option and click on the selection to remove those colors.
Now you have an active selection around your logo that you can use to create your outline.

Step 2: Create A New Layer Above Your Logo
You need to create your stroke on a separate layer from your logo for this effect to work. To create a new layer, click on the new layer icon at the bottom of the Layers Panel. Make sure that it’s above your logo layer in the layer stack.
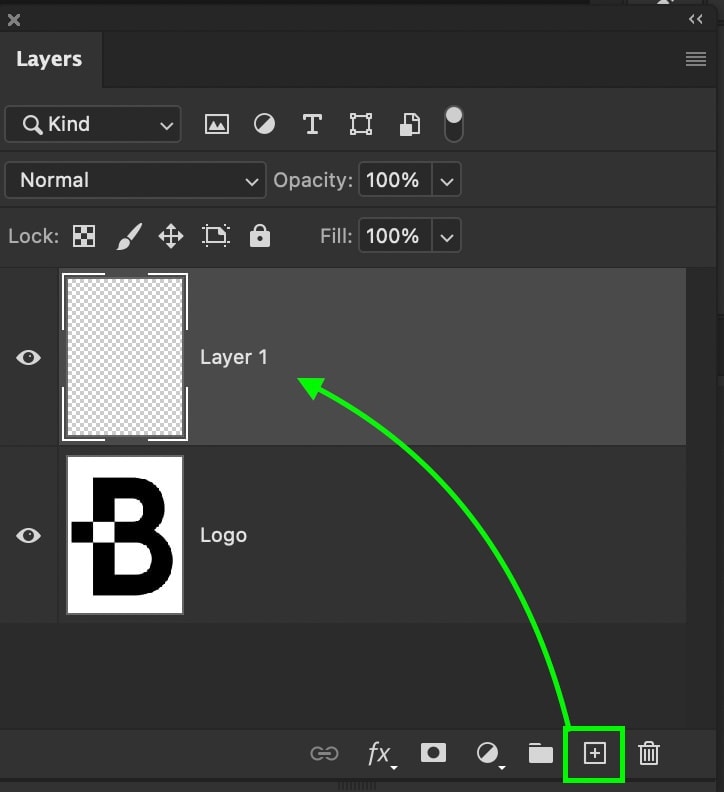
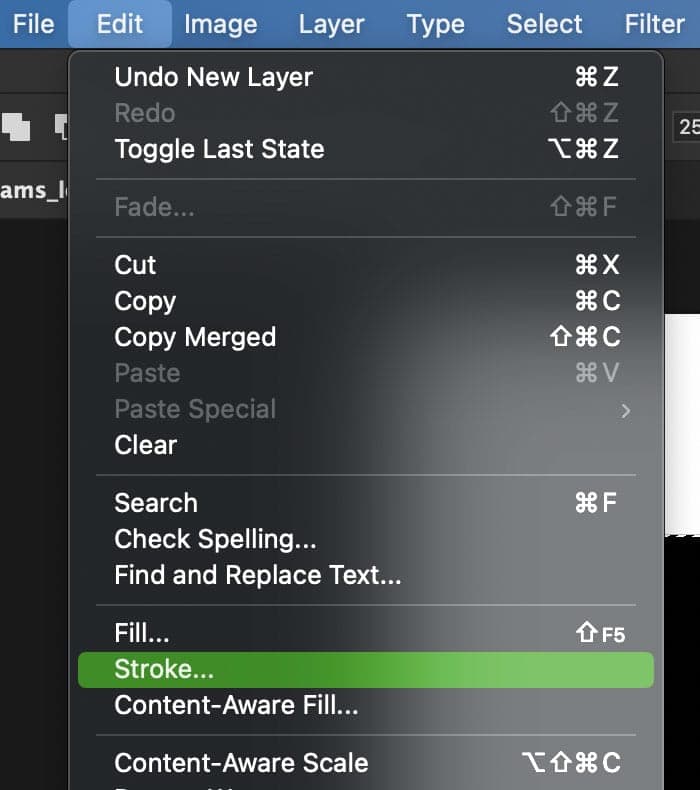
Step 3: Go To Edit > Stroke
With your selection active and your new layer selected, go to Edit > Stroke to stroke your selection.
Step 4: Set The Outline Width And Color
In the dialogue box that appears, you can adjust the look of your stroke. First, choose a width for your stroke. The higher this number, the thicker your outlined logo will look.
Next, click on the Color option and choose a color for the outline of your logo.
Then set the position to “Center” so your outline extends equally on the outer and inner edge of your selection.
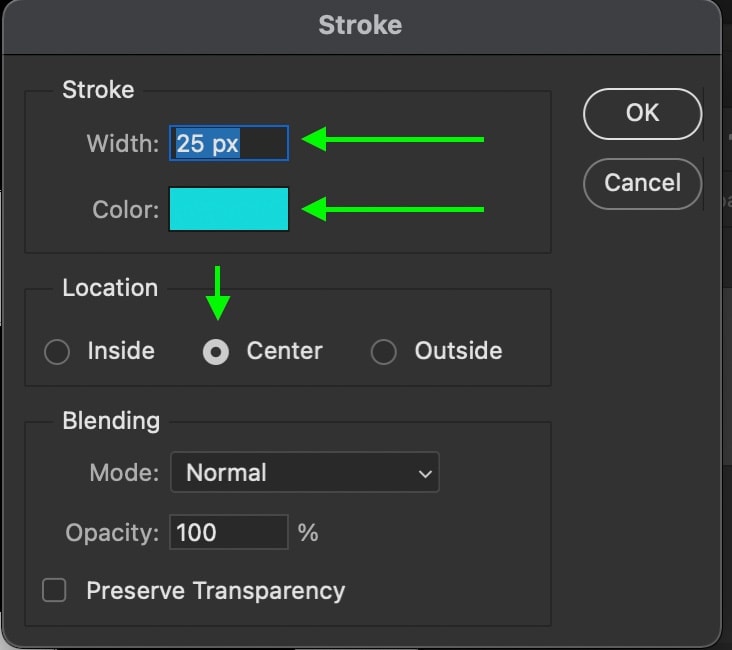
Once you’re happy, click OK to apply the stroke to your selection.
Step 5: Press Command/Control + D To Deselect The Logo
Now an outline has been created around your logo, but the selection is still active. Press Command + D (Mac) or Control + D (PC) on your keyboard to deselect it.
Step 6: Hide Your Logo Layer
To finalize the effect, click on the eyeball icon beside your logo layer to make it invisible. Now all that’s left is the layer with your outline on it, creating an outline-only logo.
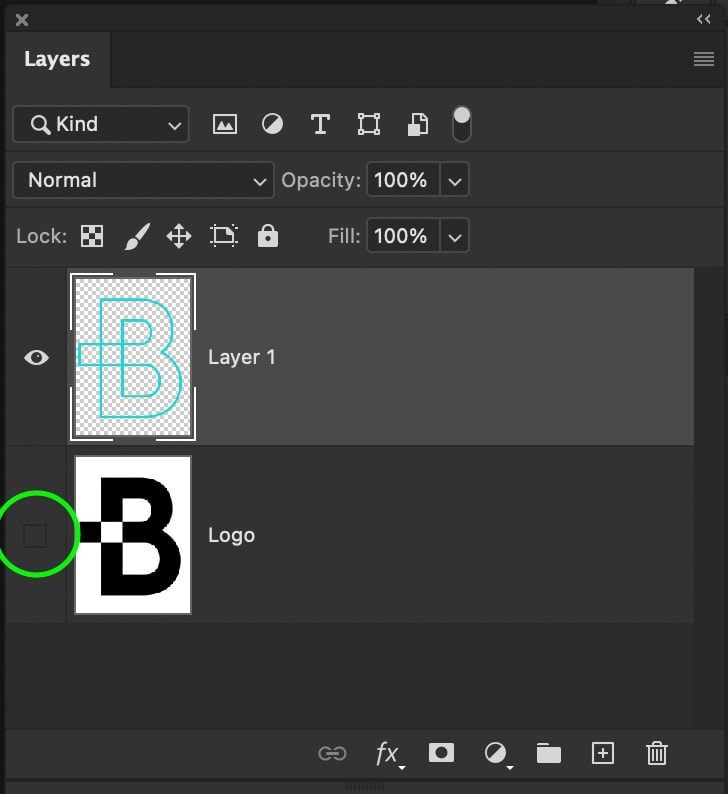
The Result
With these simple steps, you can remove the solid color of your logo and replace it with an outline. This is an easy way to create a different look for your logo and spice up your branding!
How To Outline Away From The Edges Of A Logo
In the last two examples, you learned how to create an outline around the exact edges of your logo, but what if you wanted to move the outline further away? With a slight variation to what you have learned so far, you can easily do just that.
Once again, you need to start by selecting your logo. If the logo is already cut out, simply press Command or Control and click on the logo layer thumbnail. This will turn your logo into an active selection based on the visible pixels in the layer.
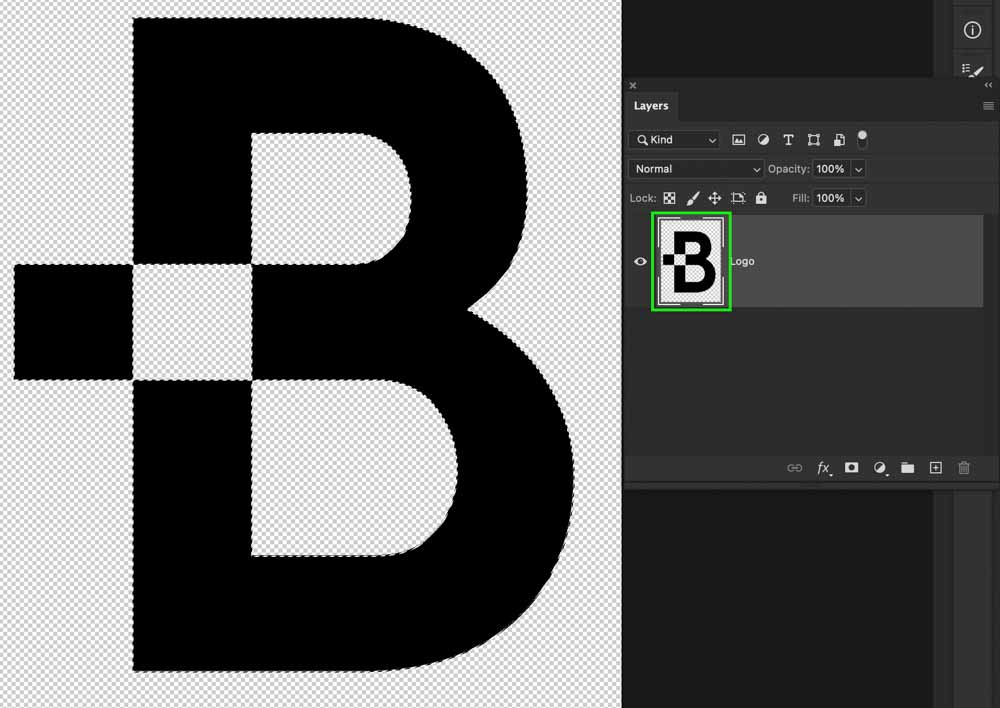
If your logo has not been cut out yet, you can learn how to quickly do so here.
With your selection active, go to Select > Modify > Expand.
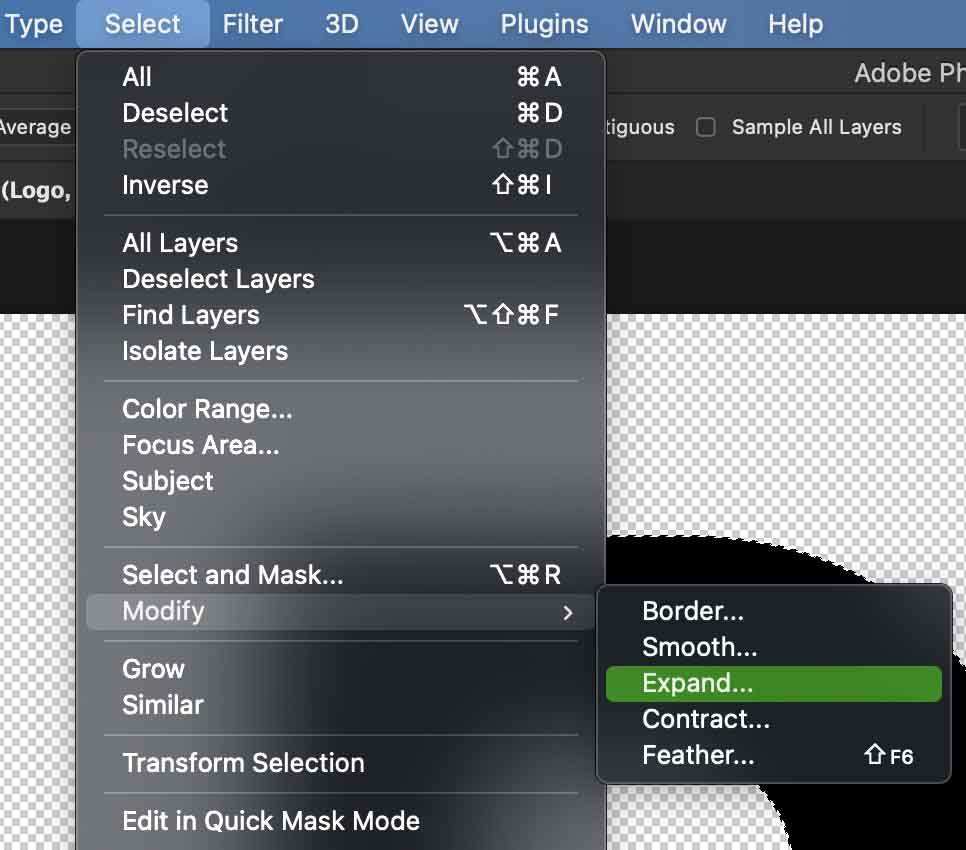
In the dialogue box that appears, set a number of pixels to specify how far you want your outline to be from the logo. In this example, I will set 50px for moderate spacing.
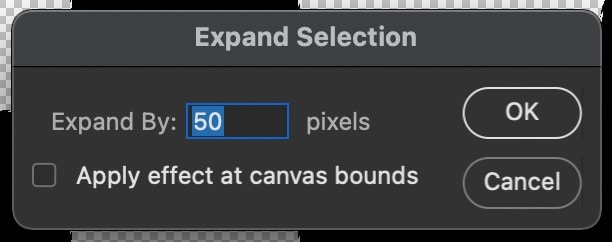
Now the active selection will bump outwards by the amount you specified in the previous dialogue box. Now create a new layer and place it above your logo layer so you can edit non-destructively.
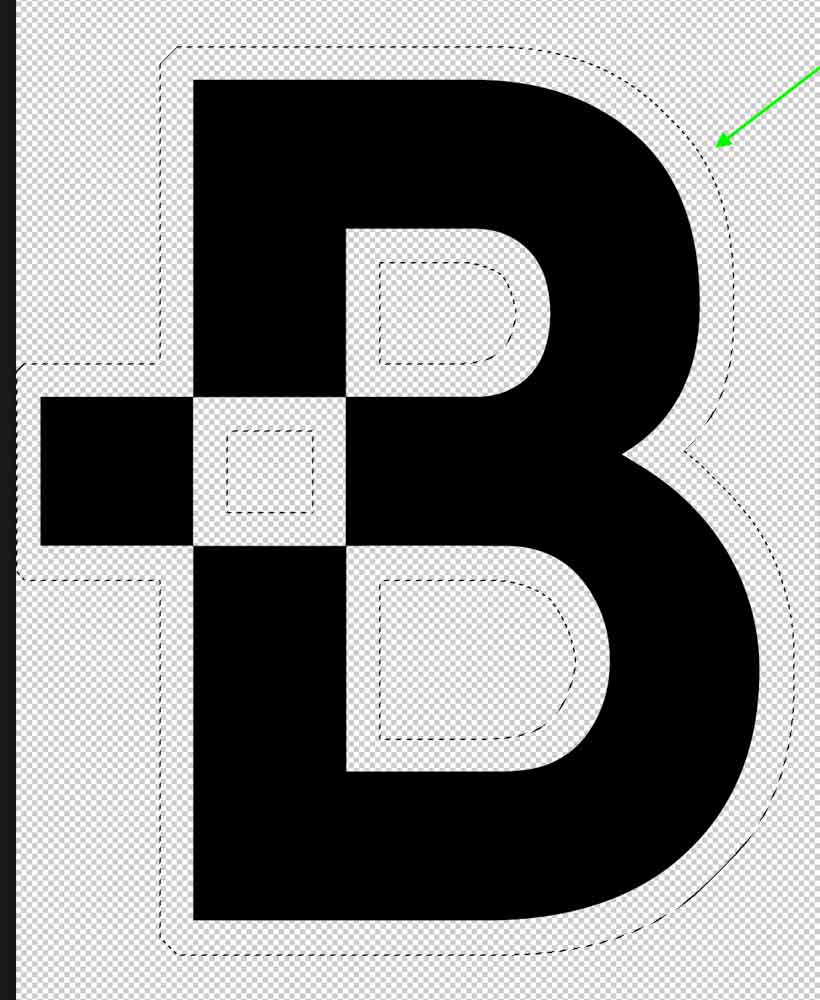

With the new layer selected, add a stroke to the selection by going to Edit > Stroke. In the dialogue box that appears, set the width, color, and position of your outline. Since I want my stroke to appear as far away from the logo as possible, I will set the position to “Outside.” Now the stroke will only appear on the outer edge of the active selection.

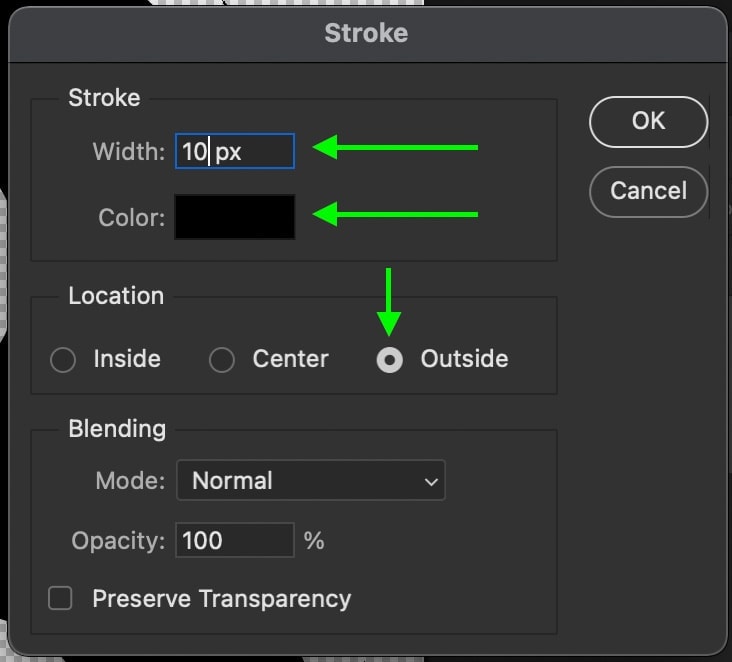
Once you’re happy with the settings, click OK to add the stroke to your selection. Then press Command + D (Mac) or Control + D (PC) to deselect the active selection.
Since you expanded the selection away from your logo, the stroke is created away from the edge for a more unique look.

You can even try using the outline for a haloed look by selecting the outline layer and repositioning it with the Move Tool (V).

How To Add A Gradient Outline To A Logo In Photoshop
To create a gradient logo outline, ensure your logo has a transparent background, then double click on the logo layer to open the Layer Styles. Next, select the Stroke style and set the fill to Gradient. You can further customize the gradient outline by choosing a preset in the Gradient Editor.
Let’s break this down more in-depth.
Using the methods you learned earlier in this post, make sure your logo has a transparent background. I always recommend using the Magic Wand Tool for this type of selection.
Once the logo has a transparent background, double-click on your logo layer to open the Layer Styles. Similar to before, select the Stroke style, but now set the fill to Gradient.
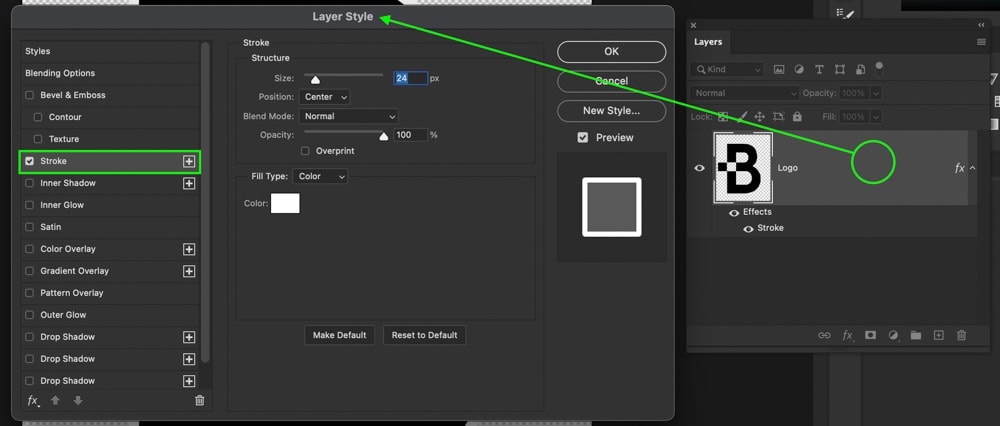
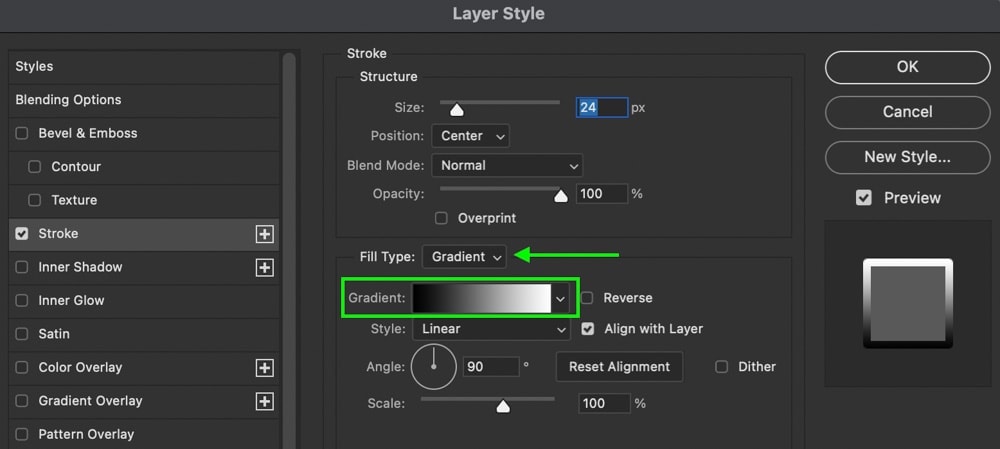
To customize your gradient outline, click on the gradient editor and choose from one of the preset gradients available.
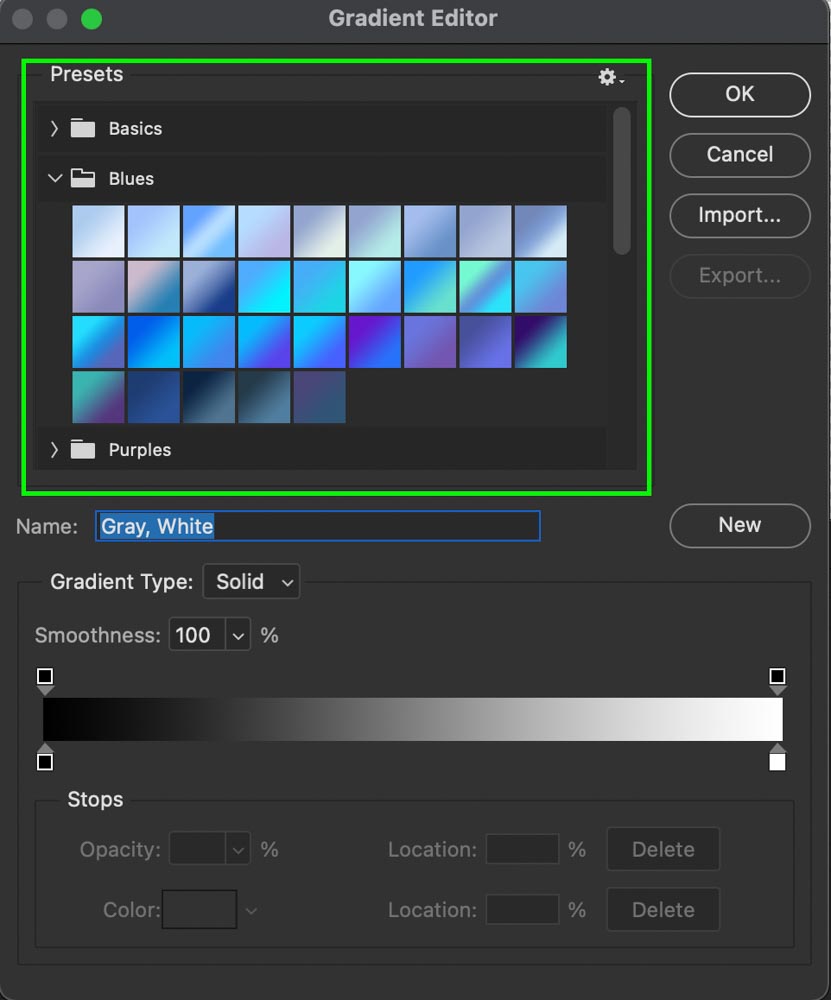
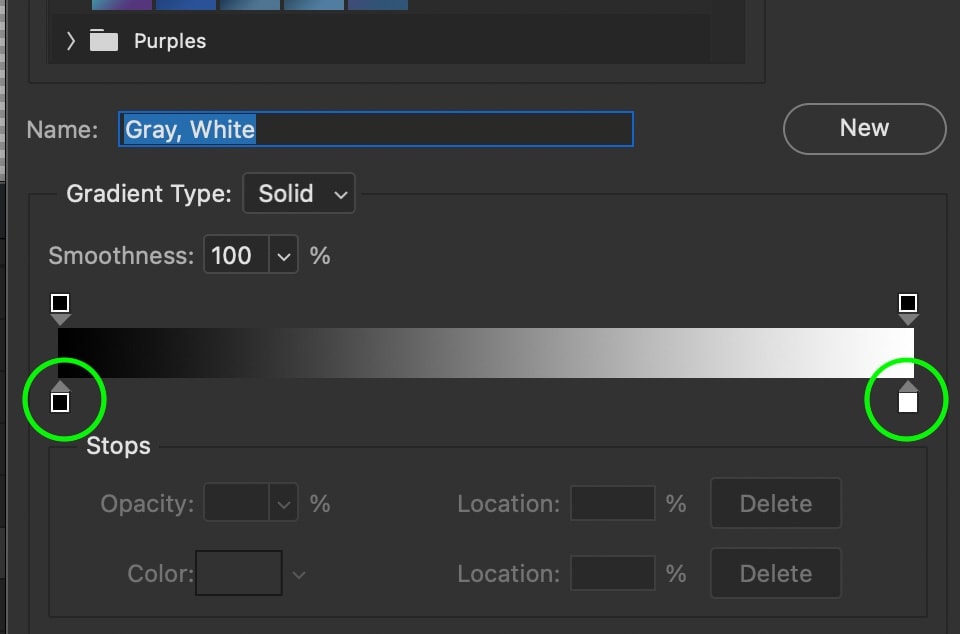
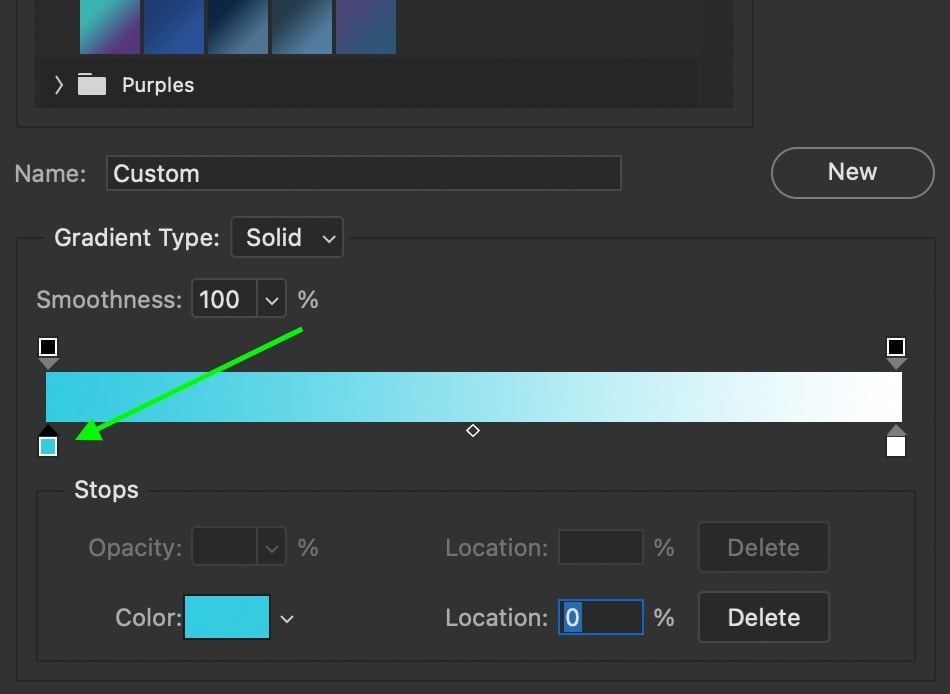
If you’d rather create your own custom colors, double click on the color swatches beneath the gradient preview to edit them. To learn more about customizing gradients, check out this tutorial.
With the look of your gradient in order, you can adjust additional settings such as the gradient’s angle, style, and scale. For most logo outlines, the Linear Gradient style works best, but feel free to experiment. The angle option will change which direction your gradient is going in. Lastly, the scale will zoom in on your gradient and alter the look of the color transition.
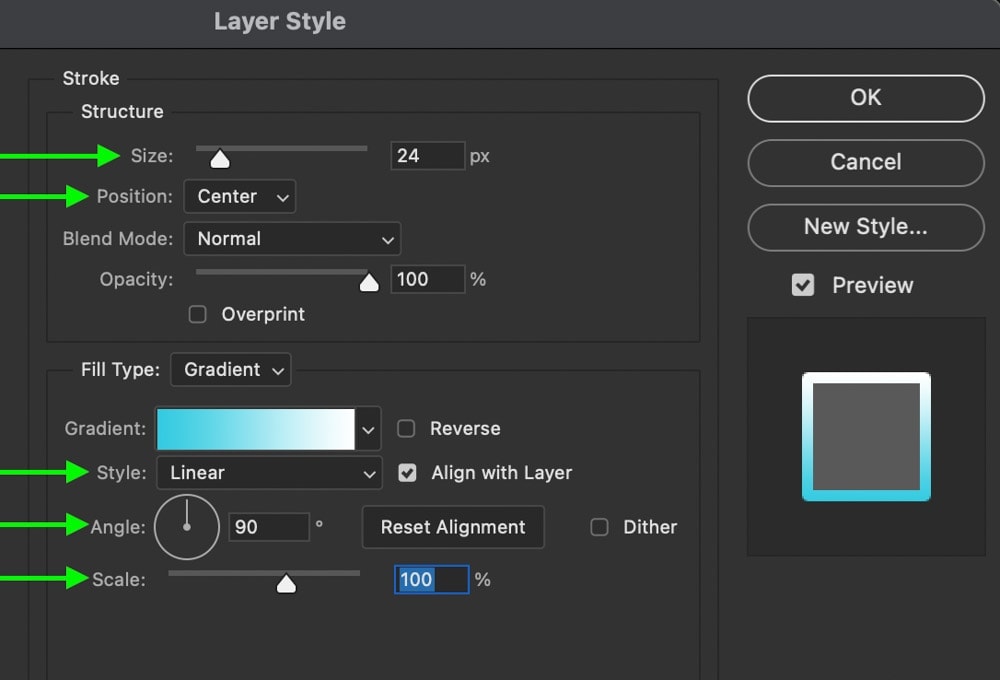
Once you’re happy with the additional stroke settings, click OK to exit the layer styles. Now you’re left with an awesome gradient outline around your logo!

How To Add A Patterned Outline To A Logo In Photoshop
To add a patterned outline to a logo in Photoshop, you simply need to choose the Pattern Fill option in the Layer Styles. Like before, make sure your logo has a transparent background, then double click on it to access the Layer Styles.
Clicking on the Stroke Style, change the Fill type to “Pattern.”
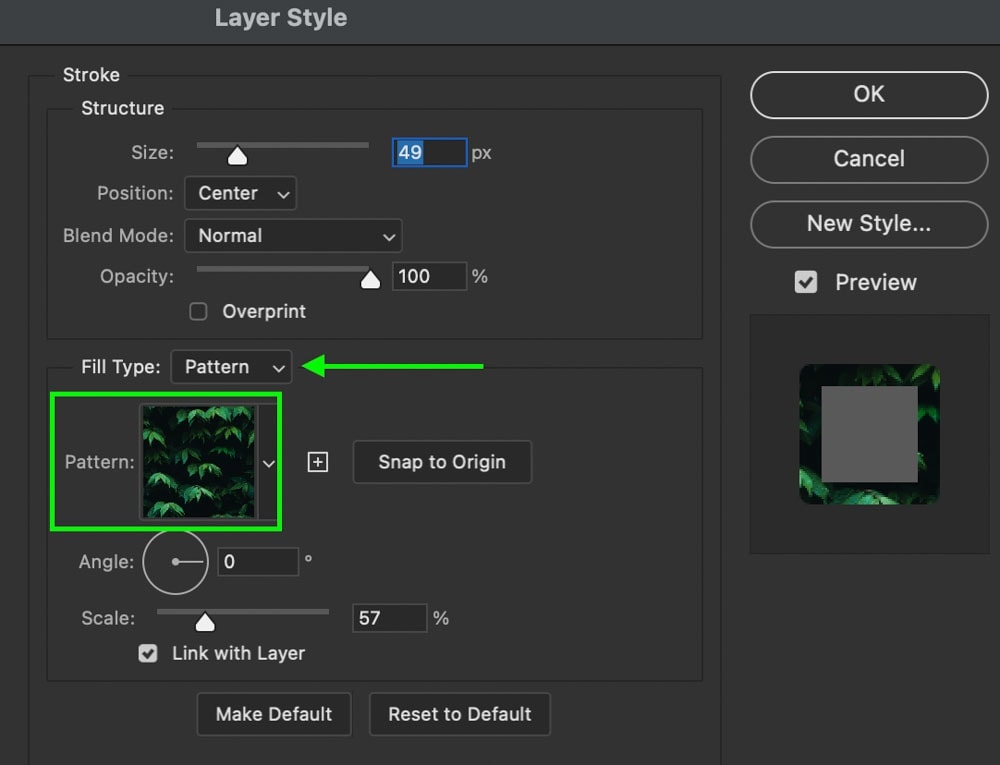
By clicking on the Pattern Preview, you can choose between a variety of default patterns in Photoshop. If you want to spice things up, you can get new patterns for free from Brusheezy.
From there, you can customize the scale and angle of your pattern as needed to suit your style.
Then go through and adjust the remainder of your stroke settings to refine the patterned outline of the logo. Once complete, click OK.
Now you have a cool pattern around your logo rather than a plain jane colored outline!

How To Fill A Logo Outline With An Image
The final logo outline effect in Photoshop is filling the outline with an image. Using the help of a clipping mask, this can be done very quickly without ever using the Layer Styles!
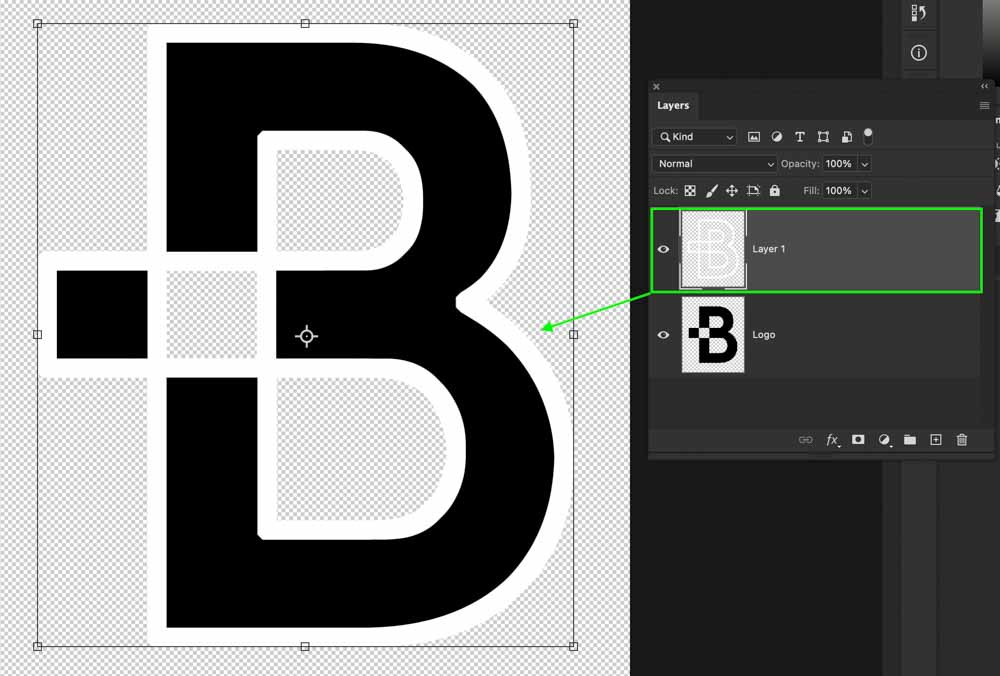
After removing the background from the logo, press Command or Control and click on the logo layer thumbnail to create a selection.

Now create a new layer and place it above the logo layer so that you can edit the outline independently from the logo.

With your new layer selected and the selection active, go to Edit > Stroke to outline your selection. In the dialogue box that appears, choose a width you would like for the outline. The color doesn’t matter since it will be covered by an image in the following step. Finally, click OK to apply the stroke to your selection.

Then press Command or Control + D to deselect the active selection.
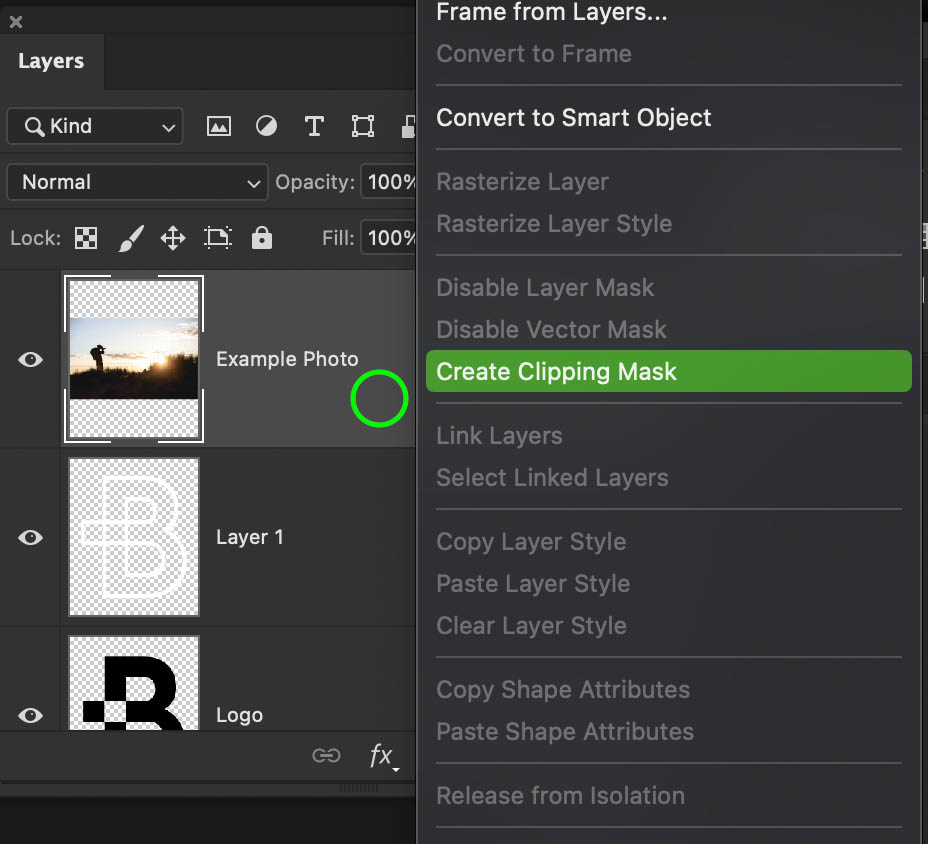
Now open the image layer you want to fill your outline with and place it above the outline layer. Once the image is placed, right-click on it and select Create Clipping Mask. This will make your image layer only visible within the parameters of the layer it is clipped to, which is the outline.
You can then customize the position and size of your image in the outline by accessing the Move Tool (V), clicking on your image layer, then clicking and dragging on the transform box to adjust it.
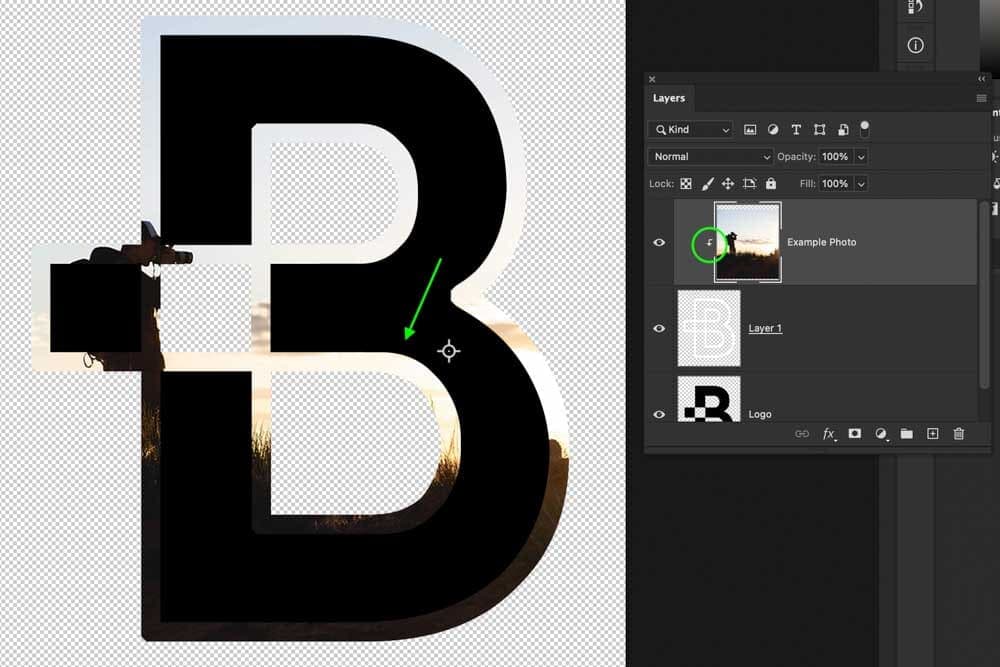
And now you have an outline around your logo filled with an image!

As you can see, there are a variety of great ways to outline a logo in Photoshop. Whether you want a simple colored outline, a gradient outline, an image outline, and more, you now have all the skills to do it! Now to help you further customize the look of your logo, check out this next tutorial covering how to change the color of any logo in Photoshop!
Happy Outlining,
Brendan 🙂
