
Choosing colors is one of the most important things to do in a graphic design project. Using Color Swatches in Photoshop, you avoid losing colors you spent so much time choosing because they will always be available for future use once you’ve saved them correctly.
In this article, you will learn what color swatches are, how to create them, and where to find new color swatches to use in your projects.
How To Create A Color Swatch In Photoshop
Step 1: Locate The Swatches Panel By Going To Window > Swatches
The Swatches Panel is located on the right side of the workspace, next to the Color Panel. If, for some reason, you can’t see the Swatches Panel, go to Window > Swatches.
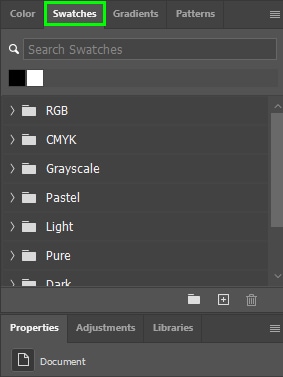
The colors you used last in Photoshop are at the top of the Swatches panel. Photoshop stores those colors for your convenience. Below those swatches are folders with Photoshop’s default color swatches.
The default swatches can come in handy, but the best thing about color swatches is the possibility of creating your own swatches. The easiest way to choose colors is to sample from an image. To do this, open the photo from which you want to take colors in Photoshop.
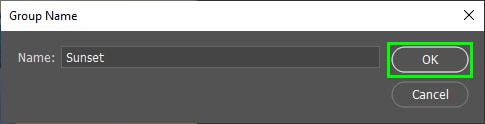
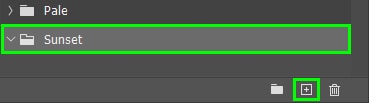
Step 2: Click On The Folder Icon To Create A New Folder
Within the Swatches panel, click the folder icon at the bottom.
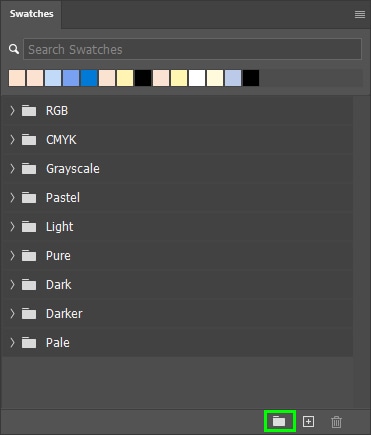
Rename the new group of swatches if you want in the Group Name box and click OK. The new folder will appear in the Swatches Panel.
Step 3: Select The Eyedropper Tool (I) To Sample A Color
Now, grab the Eyedropper Tool (I) from the Toolbar.
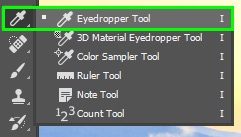
Then, click with the Eyedropper Tool on the color you want to sample. To make your job easier, zoom in on the target area by pressing Control + + (Win) or Command + + (Mac). In my case, I sampled the bright yellow color in the horizon of my image.

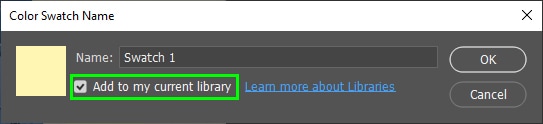
Step 4: Click On The Plus Sign Icon In The Swatches Panel
The color you sampled will appear in the foreground swatch in the Toolbar. When that happens, the color will be ready to be added to the Swatches panel.
Next, keep the folder you created selected and click the plus sign icon in the Swatches Panel. This will create the first color swatch.
Rename it if you want. To prevent the Color Swatch Name dialog box from popping up whenever you create a new color swatch, hold Alt (Win) or Option (Mac) while clicking the plus sign icon.
You can also check the Add to my current library checkbox. This will save the new swatch in your Adobe library, which is helpful if you need to use the color swatch on another computer or share it with someone.
Keep creating new swatches until you have all the desired colors stored in the Swatches panel.
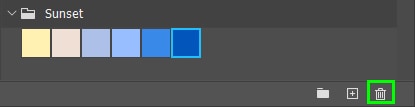
Step 5: Click The Bin Icon To Delete Unwanted Color Swatches (Optional)
When creating color swatches, you may add more colors than necessary or notice that your color swatches have too many similar colors. Whatever the case may be, deleting color swatches is very easy.
Simply select the color swatch you want to remove. Then, click the trash bin icon at the bottom of the Swatches Panel.
How To Install Color Swatches Into Photoshop
Step 1: Use The Explore And Trends Sections On The Adobe Color Website
There are many places you can find color swatches to download. However, I recommend you use the ones from the Adobe Color website. Go to the Adobe Color website and select either Explore or Trends in the top menu.

In the Explore section, you can find palettes from various colors, some with and others without their photo references. You can also search for palettes using keywords. For example, when I typed ‘desert’ in the search bar, the website showed me palettes with warm colors.
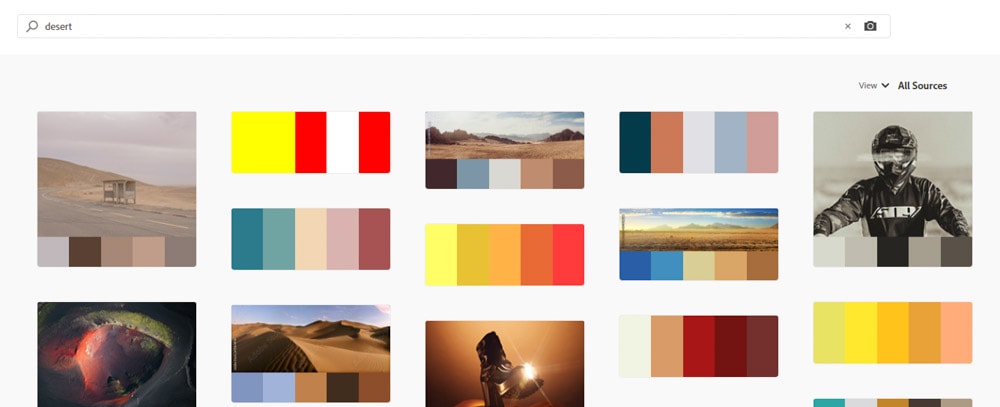
The Trends section includes pallets that are popular in different creative industries, such as fashion.
Step 2: Install The Chosen Color Swatches Using ASE
Click on the palette you want to install. Once you click the desired palette, Photoshop will redirect you to the palette download page.
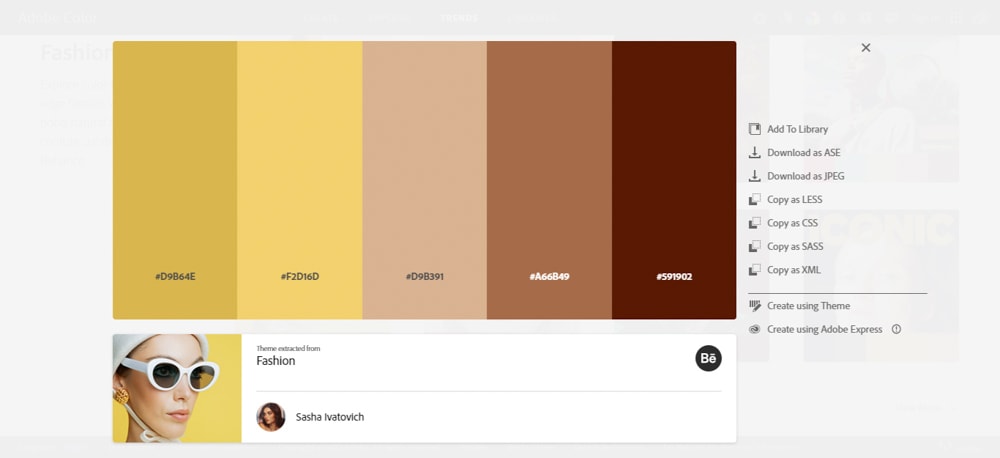
On the download page, look for the Download as ASE link on the right side of the screen to download the color swatch you chose.
Step 3: Add The Swatch Using Window > Swatches
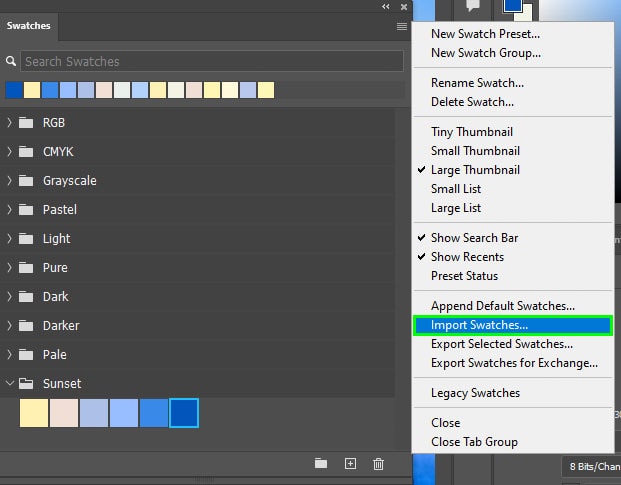
After downloading the ASE file, open Photoshop. Then, go to Window > Swatches. Within the Swatches Panel, click the hamburger menu at the top right side of the panel and choose Import Swatches.
Go to the folder where the color swatch was installed and click on it to load it into Photoshop. After that, your new swatch will be successfully installed and appear at the bottom of the Swatches panel.
As you saw here, using color swatches allows you to store your favorite colors and create your own palettes. Since I’m always working with colors in my creative projects, the swatches panel has proven helpful for my workflow. I hope you can also make the most of this feature.


