The Coolest Things You Can Do With Photoshop
If you’re looking for some cool Photoshop effects and tutorials to try your hand at, then you’ve come to the right place. Learning Photoshop can feel overwhelming at first, but with tutorials like these, it becomes a lot more fun. In this post, you’ll find 50 amazing Photoshop tutorials to try, whether you’re a total beginner or a Photoshop veteran.
As you’ll find throughout this post, there are three different sections for varying styles of editing. The three we cover here are Creative Effects, Graphics & Text Effects, and Basic Photo Editing Adjustments.
Depending on what types of effects you’re looking to create with Photoshop, each section offers something totally unique. To get things started, let’s get the creative juices flowing and go through some must-try creative tutorials in Photoshop!
– Creative Photo Editing Effects To Try In Photoshop
Here you’ll find 20 amazing creative Photoshop effects that you can try for yourself.
1. Double Exposure Effect
The double exposure effect works incredibly well for portrait images, blending scenic photos into the shape of a human figure. You can create this with the help of stock photos or take your own for this effect! With the help of a few layer masks, blending modes, and basic selection adjustments, you’ll have an amazing result in no time.
2. Paint Drip Effect
The paint drip effect uses masks to make it appear that your subject is turning into dripping paint. This is another great effect to use with portrait images and allows you to get more creative with brush adjustments. The video tutorial below also shares how you can utilize the free brushes offered with the Adobe CC Subscription to help create this effect!
3. Dual Lighting Portraits
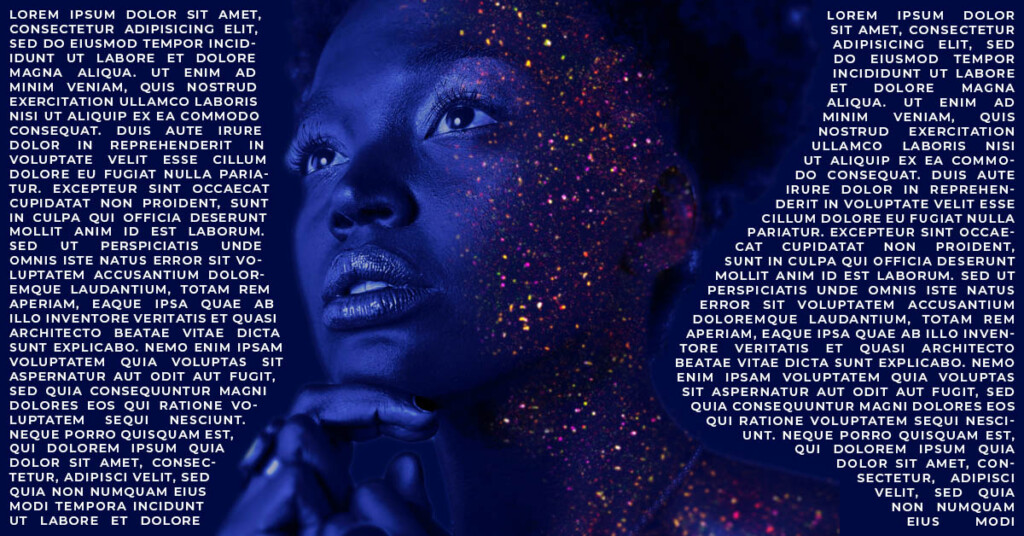
The dual lighting effect uses color gradients to give the look of studio lighting on your subject. Rather than working with expensive lights and lighting gels, you can use Photoshop instead! This effect is surprisingly easy but makes your photo look instantly more professional. After all, who doesn’t love some fancy lighting effects?
4. The Inception Effect
Have you ever seen the movie Inception? Well, that’s exactly where this cool Photoshop effect was inspired from! Taking a regular photo, you can use various Photoshop filters to distort the image and make it appear as if it’s bending. This is a really fun effect to try and works great for landscape images.
5. Creating Silhouette Composites
If you want to keep things clean and minimalist, this silhouette composite tutorial is a must. Here you’ll learn how to create a silhouetted scene completely from scratch. Photoshop has a variety of tree and grass rendering tools that you can use to quickly create this effect. Even if you’re a Photoshop beginner, I’d highly recommend trying this one out; it’s a lot of fun!
6. Moon Lanterns
As a creative take on those typical lantern photos, you can spice things up by adding a moon instead! This Photoshop tutorial walks you through selecting and cutting out a moon and blending it into another photo. This is a perfect tutorial for practicing your composite images and creates a unique photo sure to turn a few heads.
7. The Glitch Effect
If you’re into the futuristic cyber look, the glitch effect is a great Photoshop technique to apply in your work. With your RGB color channels’ help, you can quickly create a color split in your photo. From there, all that’s left is a texture and some filter options to blend it all. You can use this Photoshop effect with images or text, so the options are limitless!
8. Image Mosaics
Rather than meticulously finding the perfect images and manually piecing together a mosaic, this Photoshop tutorial makes it easy. By batch importing a series of photos, Photoshop tiles all your images automatically. From there, a blending mode helps to apply a color grading to each photo, which ultimately forms the final mosaic.
9. Water Splash In Lightbulb
This classic Photoshop effect is one you’ve likely seen before. Placing water in a light bulb is a perfect first Photoshop edit and offers satisfying creative results. The video tutorial below walks you through creating this effect with an easy to follow step-by-step process.
10. The Dispersion Effect
Want to make it look like your subjects getting evaporated like the Avengers? Well, then you’ll love this dispersion effect! Using the liquify adjustment, you can stretch out part of your image to fill your break away particles with. Then with the help of a single brush and a layer mask, you can make it appear like your subjects disappearing into thin air. This is a really fun thing to do in Photoshop that everyone should try.
11. Adding Glowing Social Media Icons
A recent fad online has been adding glowing social media icons into photos. Whether it be coming out of a phone or floating elsewhere in the image, it does look pretty cool. This tutorial will share how you can create this effect for yourself and some useful blending techniques to make it look more realistic.
Well, as realistic as a floating social media icon can look, I suppose…
12. The Forest Warp Effect
For nature landscapes or city photos, this warping effect is a must-try Photoshop effect. Using a motion blur and a gradient layer mask, you can make it appear as if part of your photo is stretching away. It creates a unique look to a photo and, in some cases, can help to isolate your subject in the frame!
13. Neon Glow Effect
Like the dual lighting effect, this Photoshop tutorial shares how to mix a portrait image with neon shapes. This surprisingly simple process is fun to follow and works great for any creative portrait you’re working with. You can mix and match the colors and shapes used here to get a unique final look.
14. The Vintage Effect
If you love the look of old film images, this vintage effect is amazing. Using various textures and adjustment layers, you can make a digital photo look like film in no time. I love how simple this tutorial is and how realistic the final result looks.
15. Create A Composite Image
A composite image is a photo that blends two or more images. In the case of this tutorial, you’ll see how you can blend a car into an empty road. Learning how to create composites in Photoshop helps build valuable editing skills and create more unique images. Although this tutorial creates a realistic composite, you could also use these techniques to create a dreamworld too!
16. Watercolor Paint Effect
This creative Photoshop effect uses watercolor brushes to make your image look like it was painted onto paper. Although surprisingly simple, this is a great way to spice up any photo. It works best for isolating the subject in your image or adding a creative twist to portrait photos.
17. Pixel Stretch Effect
The pixel stretch effect samples a single row of pixels in your image then stretches them to create a color ribbon. This effect can be used to create curved or circular pixel stretches, depending on what you’re in to.
To make life even easier, you can get the Pixel Stretch Photoshop Action to create this effect in a single click!
18. Sky Overlays
Rather than dealing with complicated cut-outs and fringing, sky overlays allow you to replace your sky with less hassle. With the help of a single blending mode and a layer mask, you can turn any dreary day into a bright sunny one.
To make this effect work well, you’ll need to have a few sky images to use for the edit. Luckily you can download 5 free sky overlay templates by clicking here.
19. Add Realistic Lens Flares From Scratch
If you’ve taken a golden hour photo, a lens flare can help accentuate the light and add more depth to your photo. If you didn’t capture a good sun flare in-camera, you can add one with the help of Photoshop! Using a built-in lens flare filter in the program, you can customize the look and size of your sun flare in seconds.
Click Here To Learn How To Add Lens Flares With Photoshop

20. iMessage Text Bubble Effect
A fun way to add more interest to your images is with this iMessage text bubble effect. Rather than a photo of a single person, you can create a story around your image with text bubbles. This tutorial shares how to create these text bubbles from scratch or provides a pre-made iMessage text bubble pack that’s a huge time saver.
Click Here To Get The Text Bubble iMessage Asset Pack.
– Graphic Design & Text Effects
For this next section, we’ll focus on cool Photoshop tutorials based on graphic design and text effects. Although Photoshop isn’t specifically meant for graphic design, there are many ways to make it work. With the 15 tutorials outlined below, you’ll have many great graphics-based tutorials to try in your free time!
21. Geometric Shape Designs
For creative image displays on a website or social media, Geometric Shapes are great to add a creative twist to a photo. This tutorial shares how to use a series of simple squares and lines to add a modern design to your graphics or images.
22. Ripped Paper Effect
Especially for collages, the ripped paper effect is a must. Rather than having boring hard edges around your photos, you can replace them with a ripped paper texture. The result looks like a series of printed photos ripped up and put together.
23. Wrap Text Around Shapes
If you’re designing a magazine cover or book page, this text wrapping Photoshop tutorial makes life easy. With the pen tool’s help and a custom path, you can set your text to appear around any shape or subject with ease.

24. Fill Text With Images
When working with text, a solid color fill might not be what you’re looking for. Instead, use this simple Photoshop tutorial to quickly fill a text layer with an image. All it takes is a clipping mask to get the job done!
25. Making Custom Collages
Whether you want to include two, three, or one hundred photos in a collage, this tutorial will teach you how to do it. In Photoshop, there aren’t any built-in Photoshop templates, so here you’ll learn to make your own. This tutorial walks you through the steps of creating a 3×3 grid collage and template, plus an effective way of adding borders to a photo.
To help you get started and save time, make sure to download these 5 FREE Collage Templates For Photoshop!
26. Give Your Logo A Transparent Background
So you have a logo, but everywhere you put it, there’s that dreaded white background. What can you do so you only see your logo and not that annoying white box around it? With the help of this tutorial, you’ll discover a fast and effective way to select and cut out any logo from a white background.
Oh, and also the important export settings required to preserve transparency!
27. Liquid Text Effect
For a psychedelic feel to any piece of text, this Liquid Text Effect is a lot of fun to try! By distorting your text, it gives the appearance of something streaking in water or being distorted by ripples. I love this effect for text, and it looks great as a stand-alone graphic too!
28. Paper Cutout Text Effect
If you’re in the mood for a clean and minimalist text effect, this Paper effect is a must-try. Although it looks relatively simple, the result looks extremely realistic. This effect aims to make it look like your text is made of craft paper, and man, oh man, does it look good!
29. Color Threshold Effect
To give your photo a retro print vibe, the color threshold effect is another fun Photoshop effect. By making selections around different sections of your photo, you can apply a single color to make it look printed. This is a very simple effect to create and is great practice if you’re new to Photoshop selection tools!
30. Creating 3D Text
Why make anything 2D when you can go 3D? It’s better with movies, and it’s better with text. This tutorial shares how to create 3D text from scratch using Photoshop. With various layer styles, you can create the illusion of depth with any text you’re working with. Just make sure to use bolder text for better results!
31. Gold Text Effect
If you love gold-plated everything, then you’ll love this Gold Text Effect in Photoshop. By manipulating the text layer styles, blending modes, and applying filters, you can have gold plated text in no time.
32. Writing Circular Text
For creating an emblem, a logo, or a simple graphic design for a youtube intro, circular text has many uses. In Photoshop, it’s easy to write text in a circle using a shape path and the text tool. This tutorial will teach you how to write text in a circle and further stylize it for better results.
33. 80’s Chrome Text Style Effect
The retro 80’s style has been coming back full swing in modern graphic design. Now you can get in on the fun with this Chrome Text Effect using chrome and neon colors to flashback in time. This is a really cool thing to try in Photoshop and take you back to the iconic style of the 80’s.
34. Placing Text Behind Objects
Making your Photoshop graphics blend into a photo and placing them behind an object is an easy way to do it. With the help of layer masks, you can quickly create this effect, even as a total beginner. This tutorial walks you through creating this effect from square one and allows for unlimited creative variations!
35. Outline Your Images
Especially for youtube thumbnails where you want to make things POP, outlining a photo is the easiest way to do it. Photoshop offers a wide range of options for outlining photos, whether you want to outline your subject, a border, or even text. After going through this Photoshop tutorial, you’ll be an image outlining wiz.
Basic Photo Editing
Now let’s jump into some more basic photo editing needs that Photoshop can help with. Whether you want to change colors, remove backgrounds, or add a general exposure adjustment to your photo, Photoshop is the tool for the job.
Let’s get into our final 15 fun Photoshop tutorials, this time to help your basic Photoshopping skills!
36. Remove Any Background From Your Photos
When you think of Photoshop, the first thing that comes to mind may be removing backgrounds. Although there are several amazing tools to cut out images, this tutorial shares 3 of the easiest. With methods as simple as pressing a single button, here you’ll learn ways to cut out any photo in less time.
37. Change Any Color In Your Photo
Changing the colors in your photo works great to stylize your image or change the look completely. In this complete guide to changing colors in Photoshop, you’ll see the one tool that makes this process unbelievably simple. Better yet, you’ll even see how to change white into any color with a helpful, must-try technique.
38. The Color Splash Effect
If you love black and white images, what about adding a single splash of color? The Color Splash Effect is a fun thing to try in Photoshop since it spices up a standard B&W image. With this tutorial, you’ll learn how to isolate any color you’d like while converting the rest to black and white. It’s extremely simple, but it can get even easier with the help of This Photoshop Action!
39. Resize Images Without ANY Quality Loss
Whether you need specific dimensions for a print, website, or social media, you want to make sure you never lose quality. This tutorial shares the best ways to scale a photo without quality loss to help you avoid some common resizing mistakes. This is another powerful purpose for using Photoshop, and I use these 3 techniques all the time!
40. Create A Signature Watermark
Let’s face it, a basic text watermark with the copyright logo isn’t any fun. Luckily, Photoshop allows you to create a custom signature watermark brush in just a few steps! With the help of your smartphone and a sharpie, this tutorial shares how to make a custom signature watermark perfect for any image.
41. Edit Photos With Neon Colors
Neon colored edits have been insanely popular recently. The only trouble is you need some pretty specific adjustments to make it look eye-catching. This Photoshop tutorial walks you through what adjustments to use to get more creative with your neon portraits!
42. Remove Blemishes & Smooth Skin
For all my portrait photographers out there, skin retouching is just another trick of the trade. Photoshop is amazing for skin retouching, offering a few amazing tools for the job. To help you get started, this tutorial shares an effective way to quickly smooth skin and remove blemishes from your subjects.
43. Add Background Blur To Your Images
If you didn’t quite get the background blur you were hoping for, Photoshop could be used to increase your background blur! This is a fun Photoshop effect that tests your selection skills by merging selections with a blur filter. That way, you can isolate your subject while adding more blur to the background. A must-try for any photographer!
44. Removing Objects From A Photo
You’re not always in control of the environment you shoot in. Perhaps you had a perfect shot, but there’s something really distracting in the background. Well, Photoshop is amazing for removing any object from your photo, and this tutorial shares some techniques to do it. This skill is incredibly useful to have no matter what purpose you’re using Photoshop for.
45. Remove A Green Screen Background
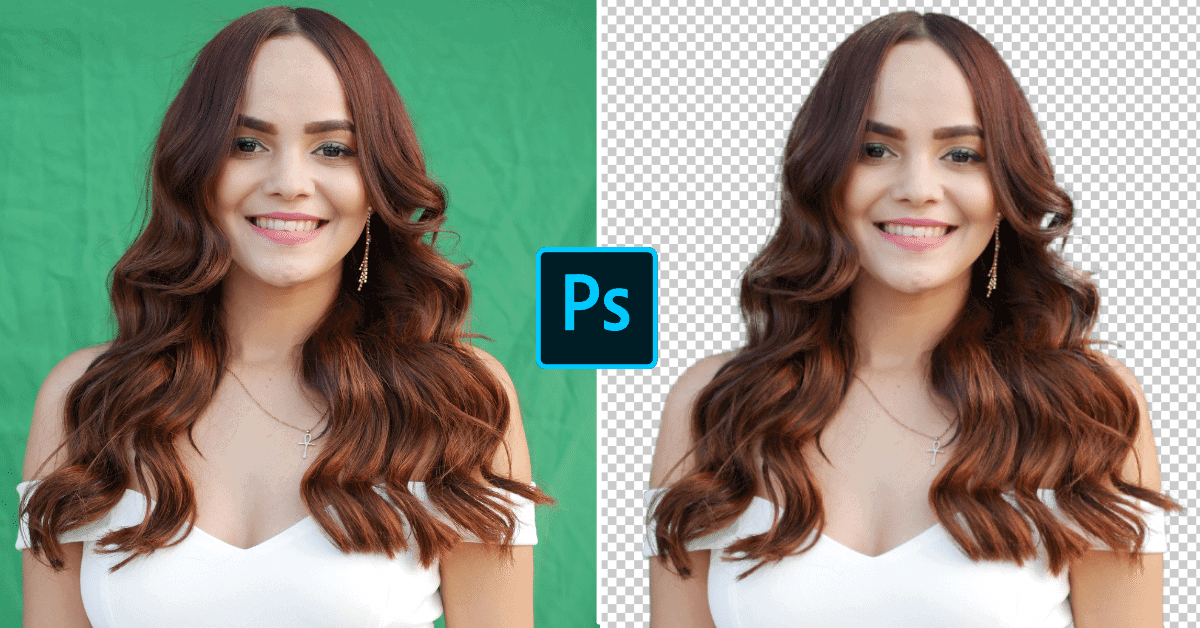
For videographers, you may tend to use a green screen background with some of your shots. In video editing programs, you can easily key it out, but what about Photoshop? Once again, Photoshop can do it all and quickly remove a green screen with this select color technique. This simple tutorial is easy to follow and will help to expand your creativity in Photoshop when using green screens!
Click Here To See How To Remove Green Screens In Photoshop

46. How To Reduce Noise In Photos
After shooting in low light and using a higher ISO, your photo will be plagued with the unwanted grain. Although there are several ways to reduce grain in your images, this tutorial breaks down an easy way to do so in Photoshop. This may be a basic skill, but a must-know for anyone working in the program!
47. How To Sharpen Your Photos In Photoshop
To make your images look as clear as possible, a little sharpening can go a long way. Although there are sharpening tools in Camera Raw, they aren’t nearly as helpful as the high-pass filter. This important Photoshop tutorial shares how to use this filter and the amazing effects it has on your images.
48. Export Images With Transparent Backgrounds
Even if you’re a master at cutting out backgrounds in Photoshop, none of it will matter if you don’t export properly. You see, not all file types preserve transparency. You have to use something more specific called a PNG file to ensure all your hard work of removing a background doesn’t go to waste upon export! This simple Photoshop tutorial shares how to export your files as a PNG with ease.
49. Make Your Subjects Eyes Pop!
As the saying goes, eyes are the portal to the soul, so you better make them look good! With more captivating eyes, you’ll notice instant improvements with any portrait you edit. This tutorial shares an effective way to retouch your models’ eyes without going overboard and making them look alien.
50. Retouching With Frequency Separation
Rather than removing blemishes, frequency separation helps to smooth blotchiness and oily skin. The end result gives you a more flawless look to your subject’s skin, no matter the lighting conditions. Here you’ll learn how to use frequency separation in your own Photoshop workflow and discover the amazing uses of this editing technique!
These 50 Photoshop tutorials are a great starting ground to kick of your creativity in the program. It’s easy to see how powerful and versatile Photoshop is and is a must-have tool for any creative. Although it takes a little bit to learn the very basics, the sky’s the limit after some initial practice.
If you’re feeling overwhelmed by the number of options here, let’s start things even easier. In a previous post, I share a 10-Step Method To Edit Photos In Photoshop that you’ll love. Whether you’re completely new to Photoshop or are getting comfortable in the program, the tips outlined there are actionable and easy to follow.
So take your time going through these 50 cool Photoshop tutorials, and soon enough, you’ll be editing like a pro!
Happy Editing,
Brendan 🙂


